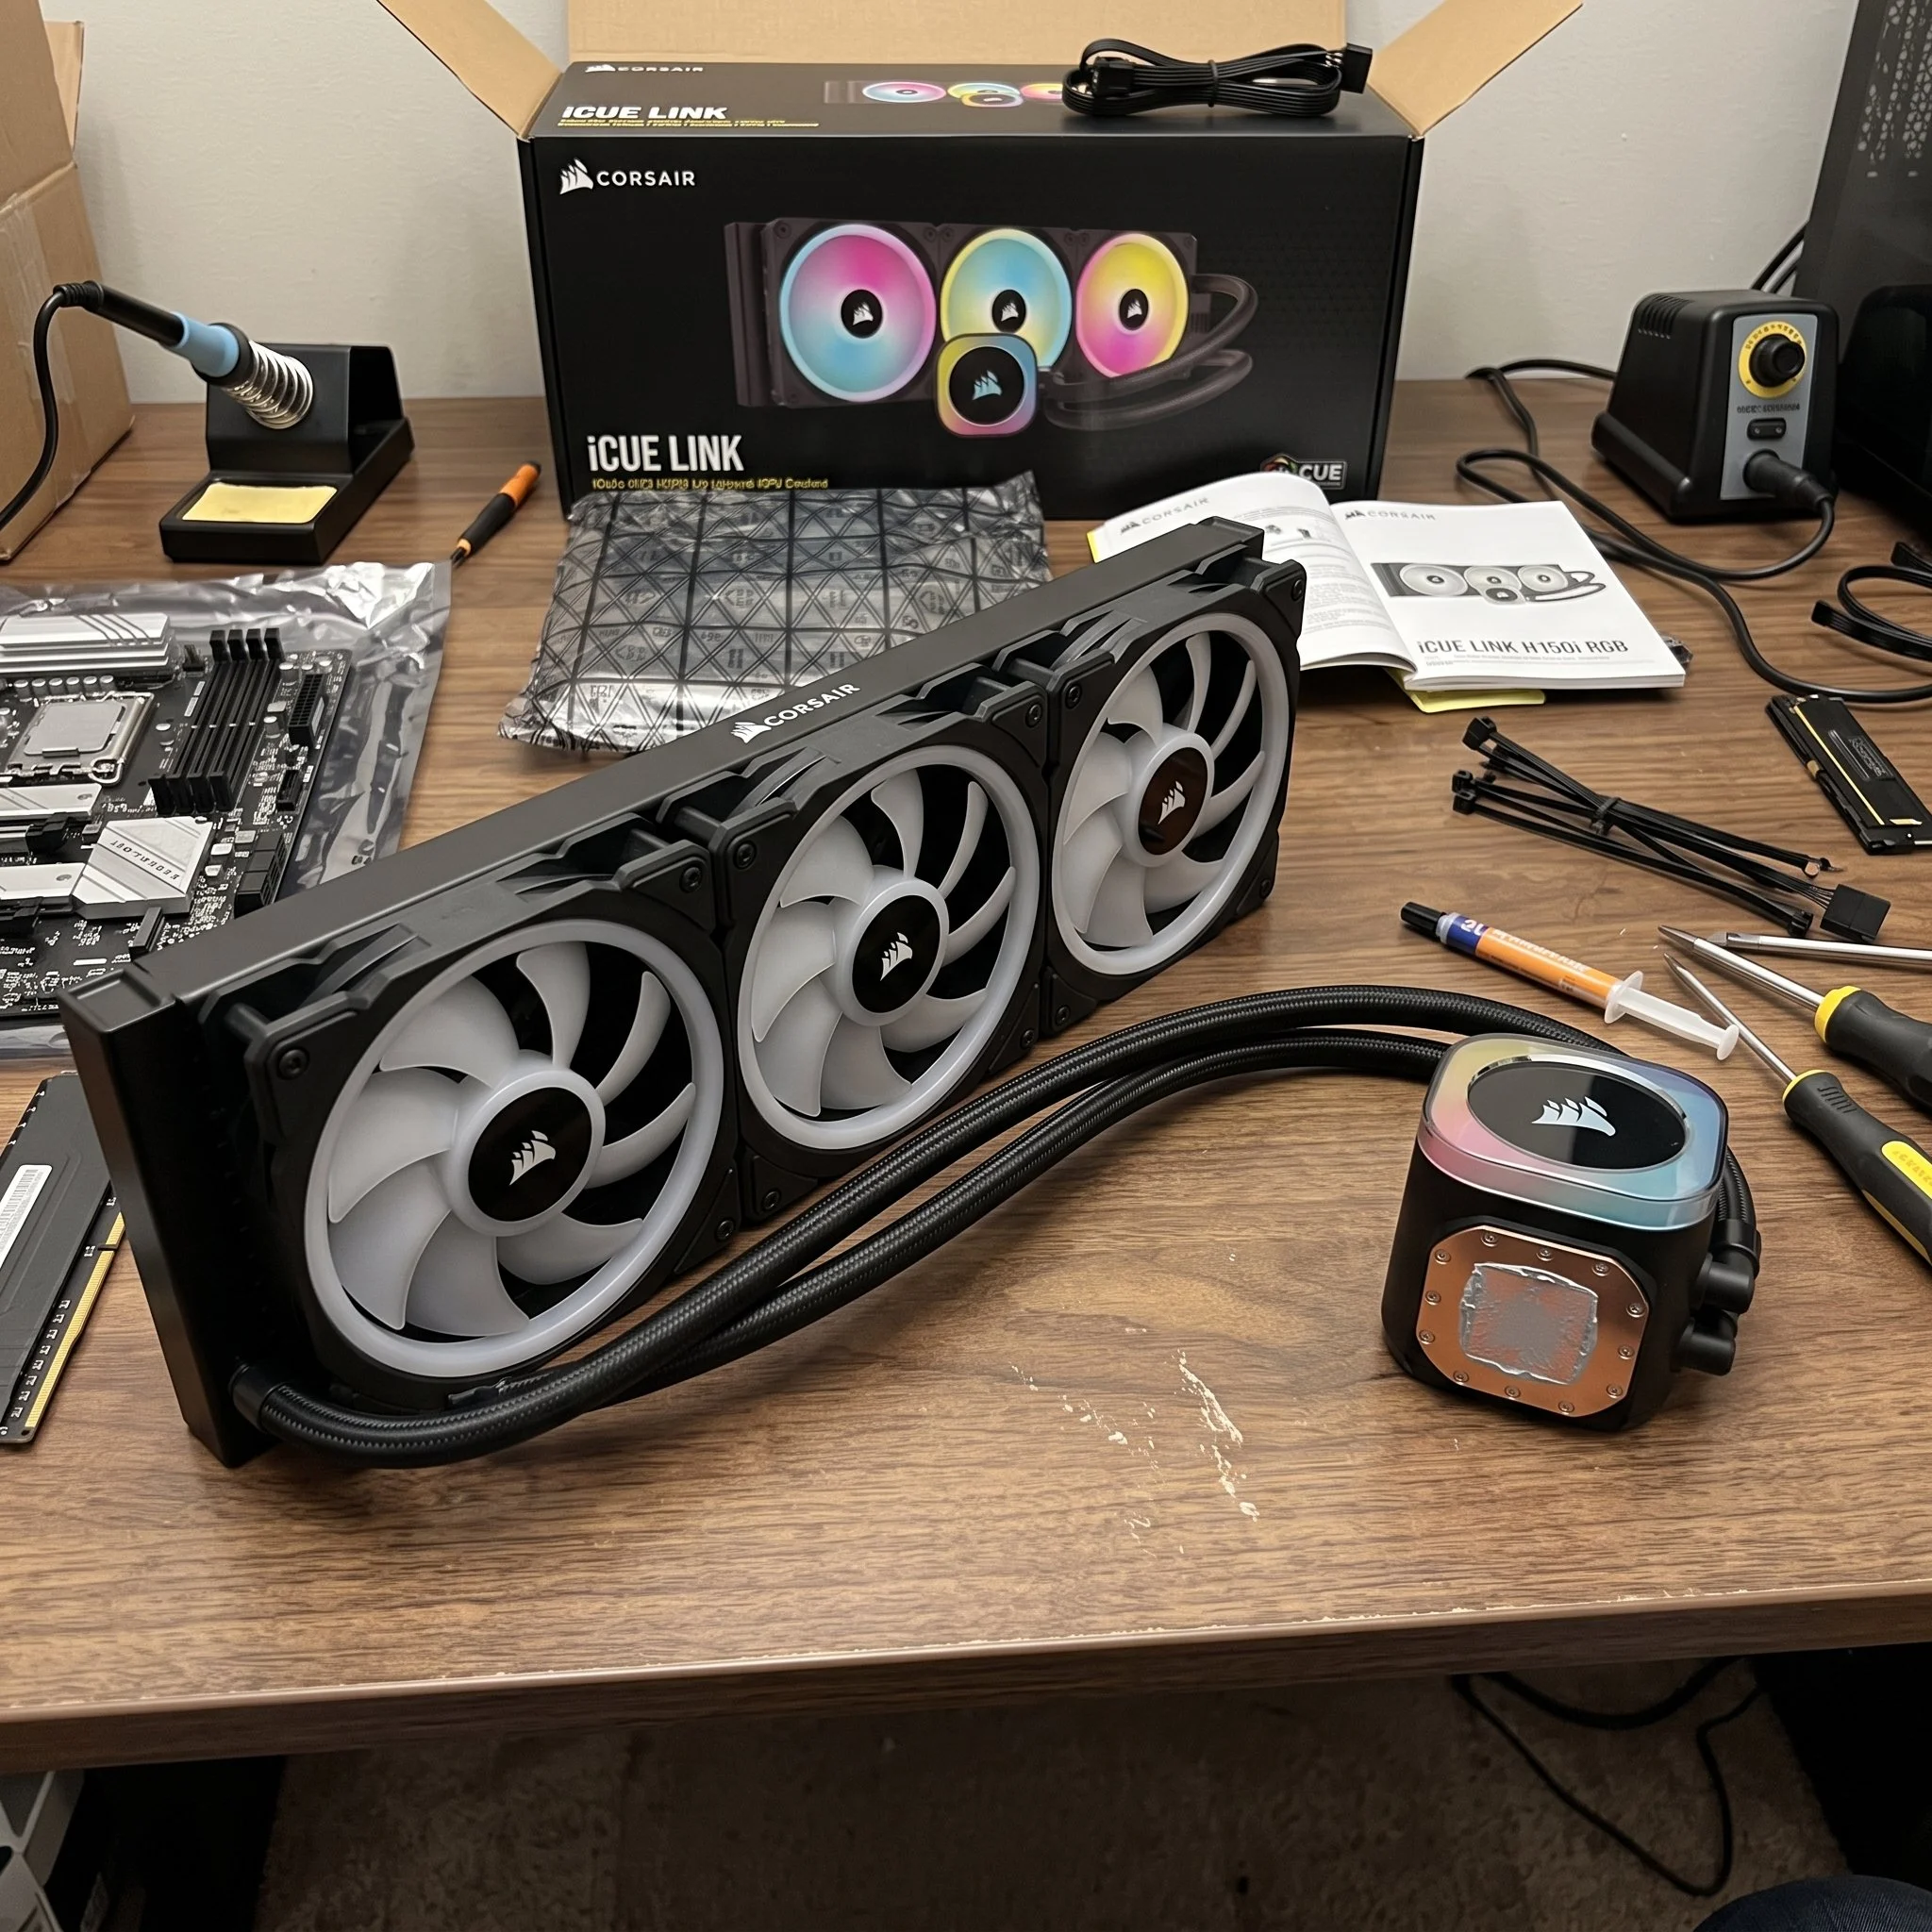
I'm going to Show You How to Properly install an AIO Cooler
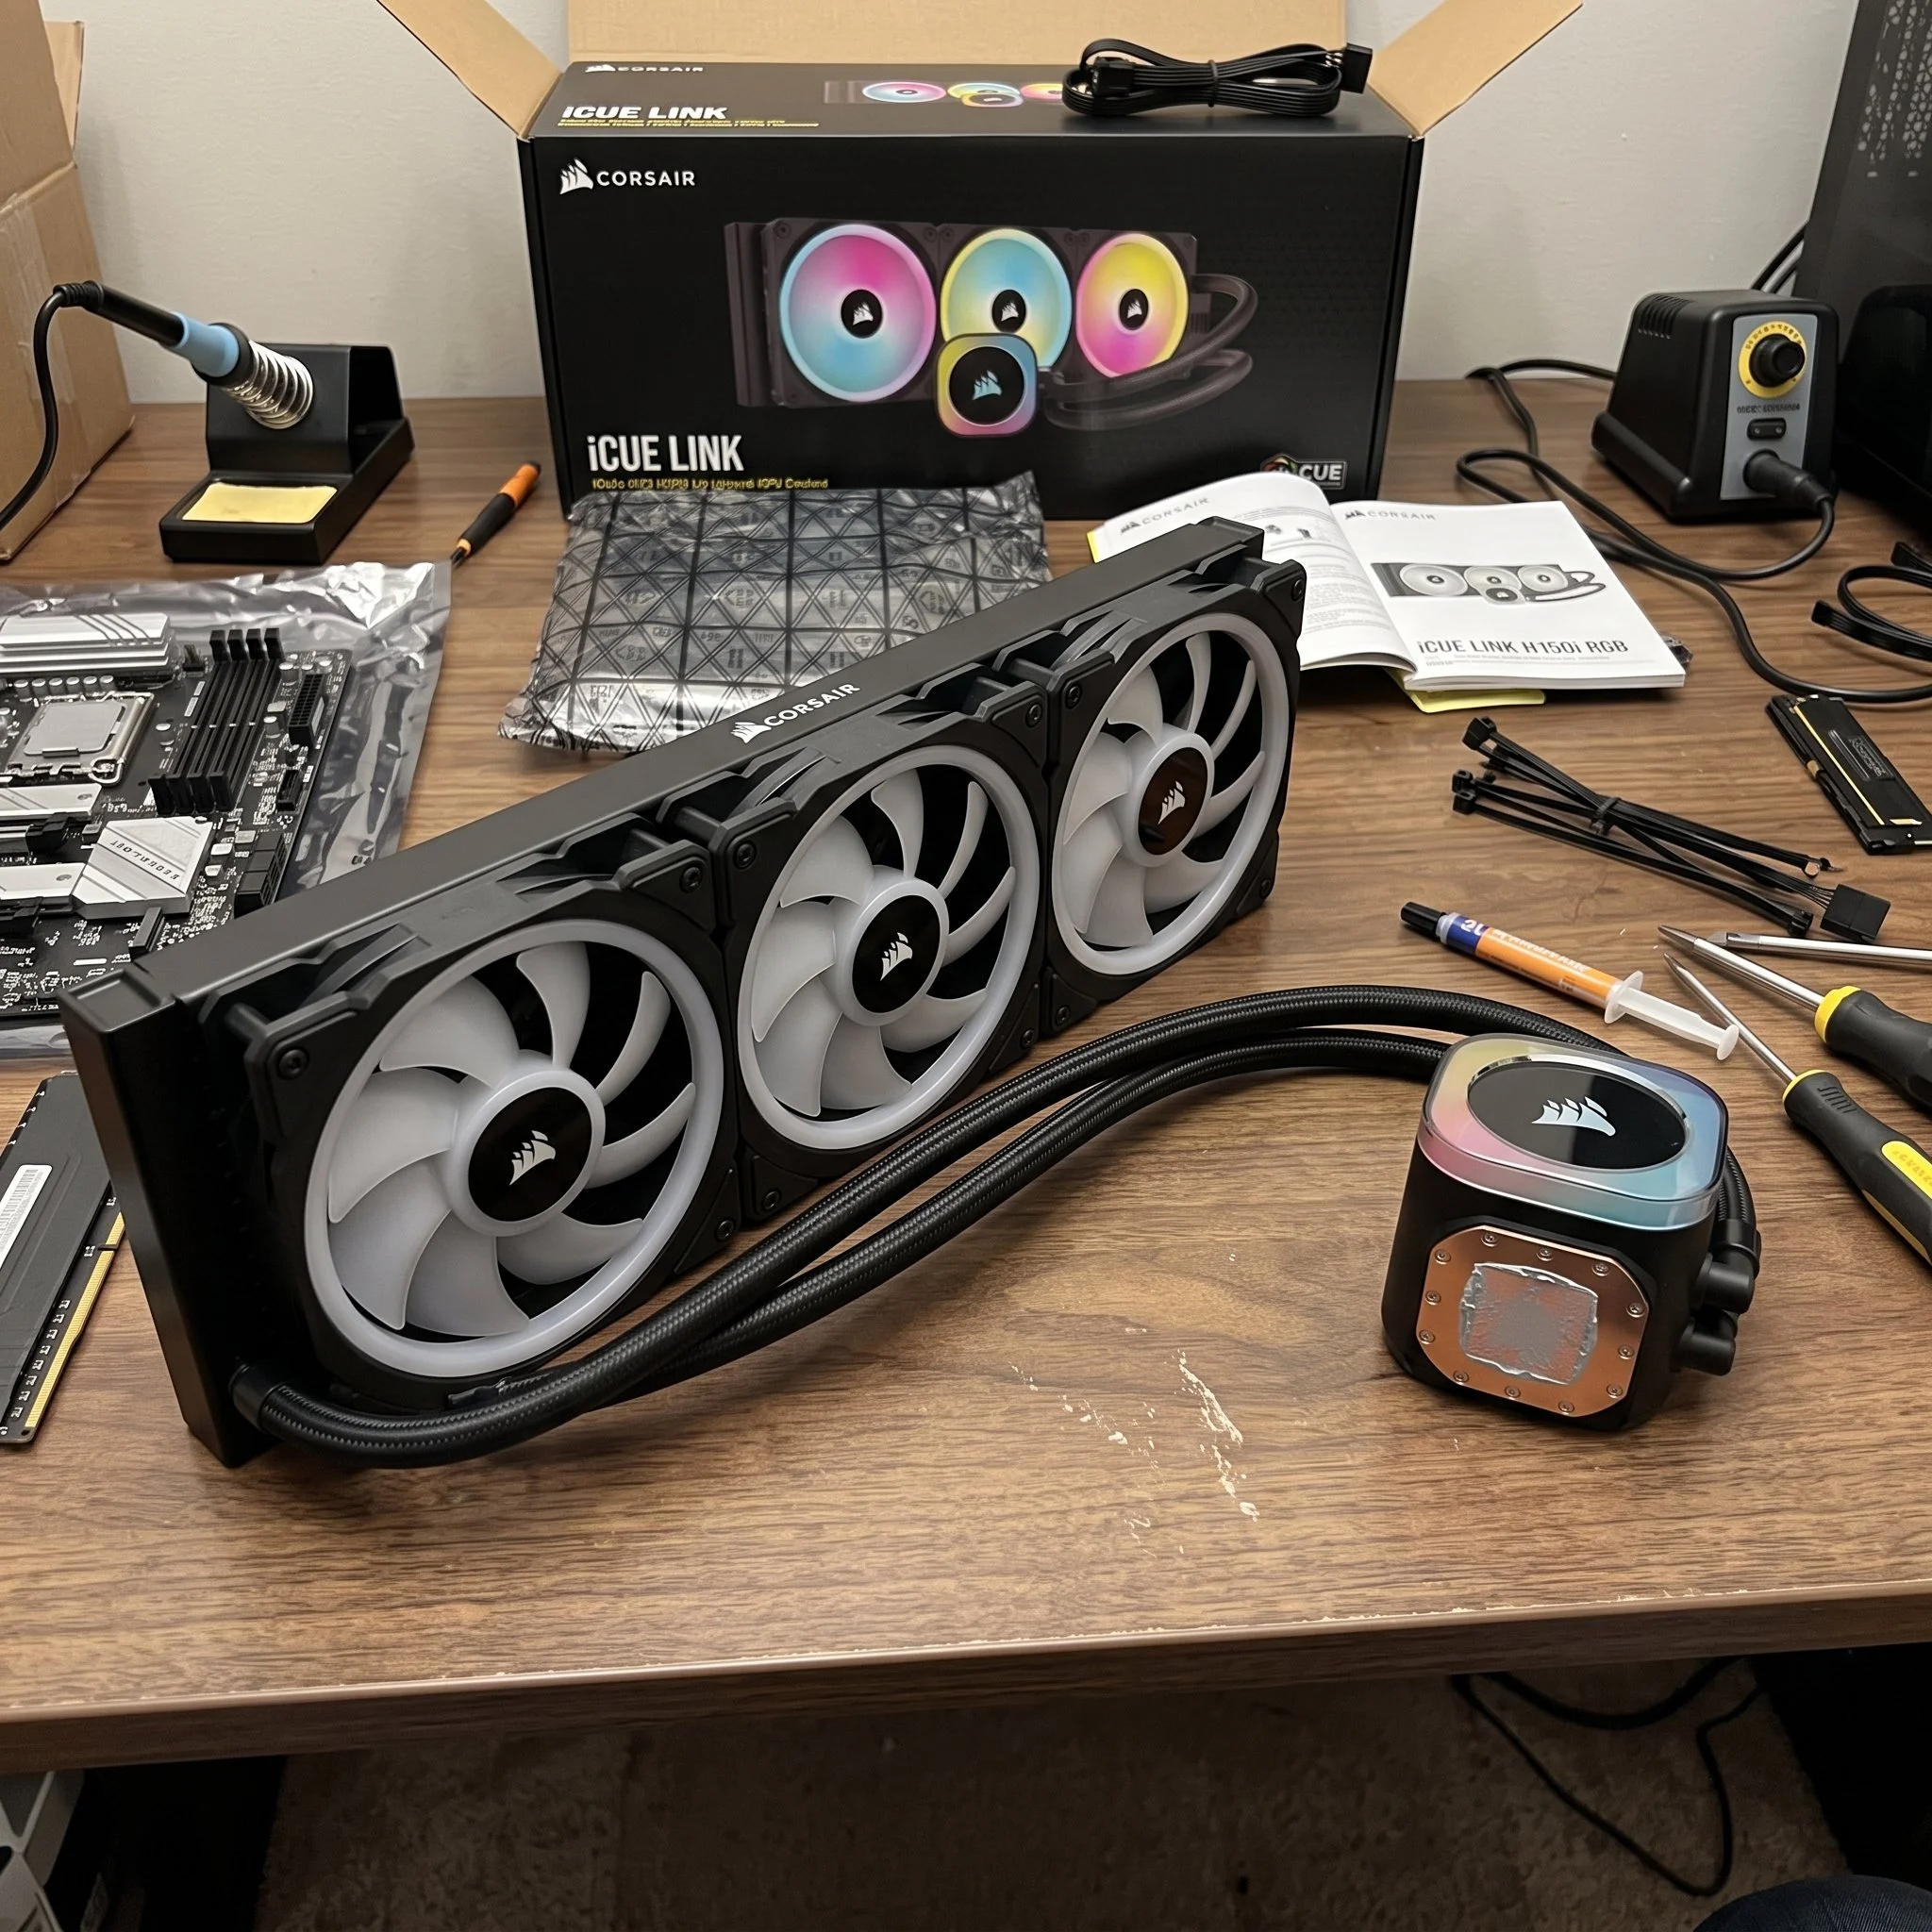
Installing an AIO cooler requires careful attention to several factors, including matching the CPU socket, applying thermal paste correctly, and positioning the radiator properly—making sure the pump block sits lower than the radiator’s highest point. With that said, if you follow along closely, step by step, I’ll show you how to install an AIO cooler the right way.
Step 1: Radiator Orientation and Placement
Before you take your cooler out of the box, inspect the inside of your PC case and plan where and how the radiator will fit. The primary rule when installing an AIO cooler is that the pump block must never be at the highest physical point in the liquid loop. An improperly placed pump block can trap air, leading to thermal throttling and hardware degradation.
Here are My Recommended Mounting Configurations
There are various mounting configurations to choose from, but it depends on the layout of the PC case.
Firstly, you have what I consider the best configuration of them all: Top Mount. This places the radiator at a horizontal angle at the very top of the chassis, allowing air pockets to settle harmlessly in the upper part of the radiator's end tank. The tubing drops straight into the CPU block, keeping the liquid flowing smoothly.
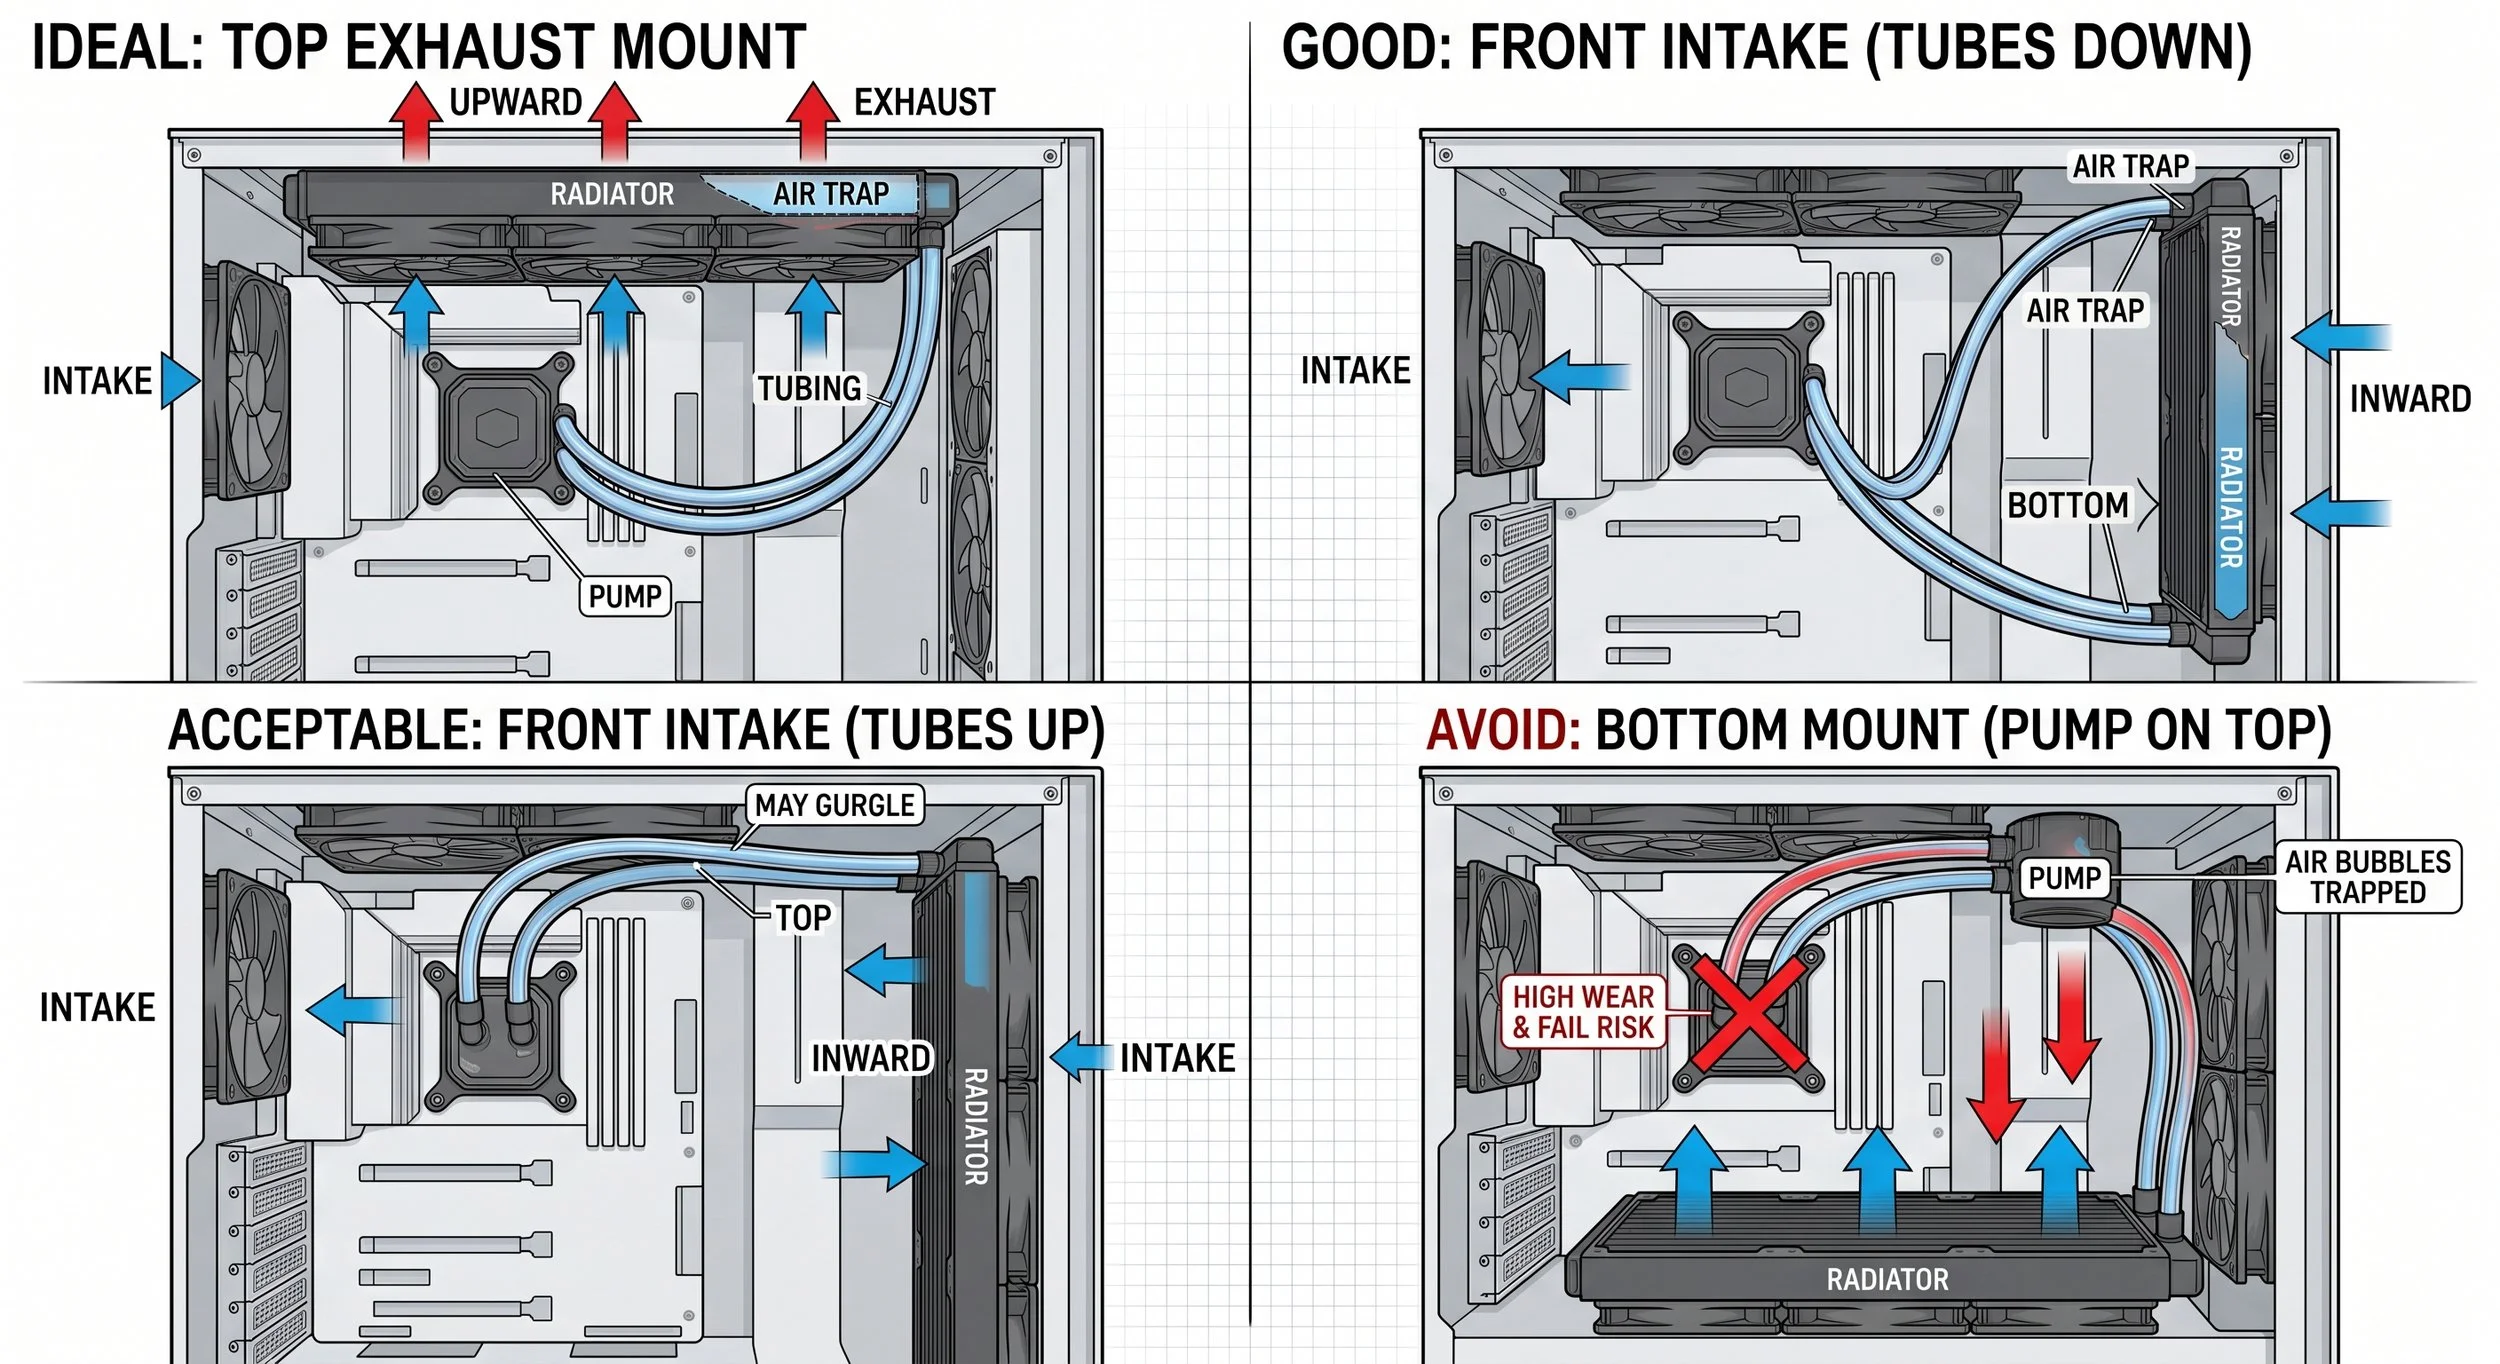
Front-mount, with the tube downward, is an excellent alternative. The radiator is mounted vertically at the front intake, with the tubing connection ports at the bottom, ensuring that air is collected in the top end tank, far from the tube inlets.
Bottom Mounting is my least favorite; I highly recommend avoiding this setup. This places the radiator at the bottom of the panel, forcing the CPU block to be at its highest point in the loop, which guarantees airflow deprivation and a performance downgrade.
2: The step-by-step installation: follow the guide
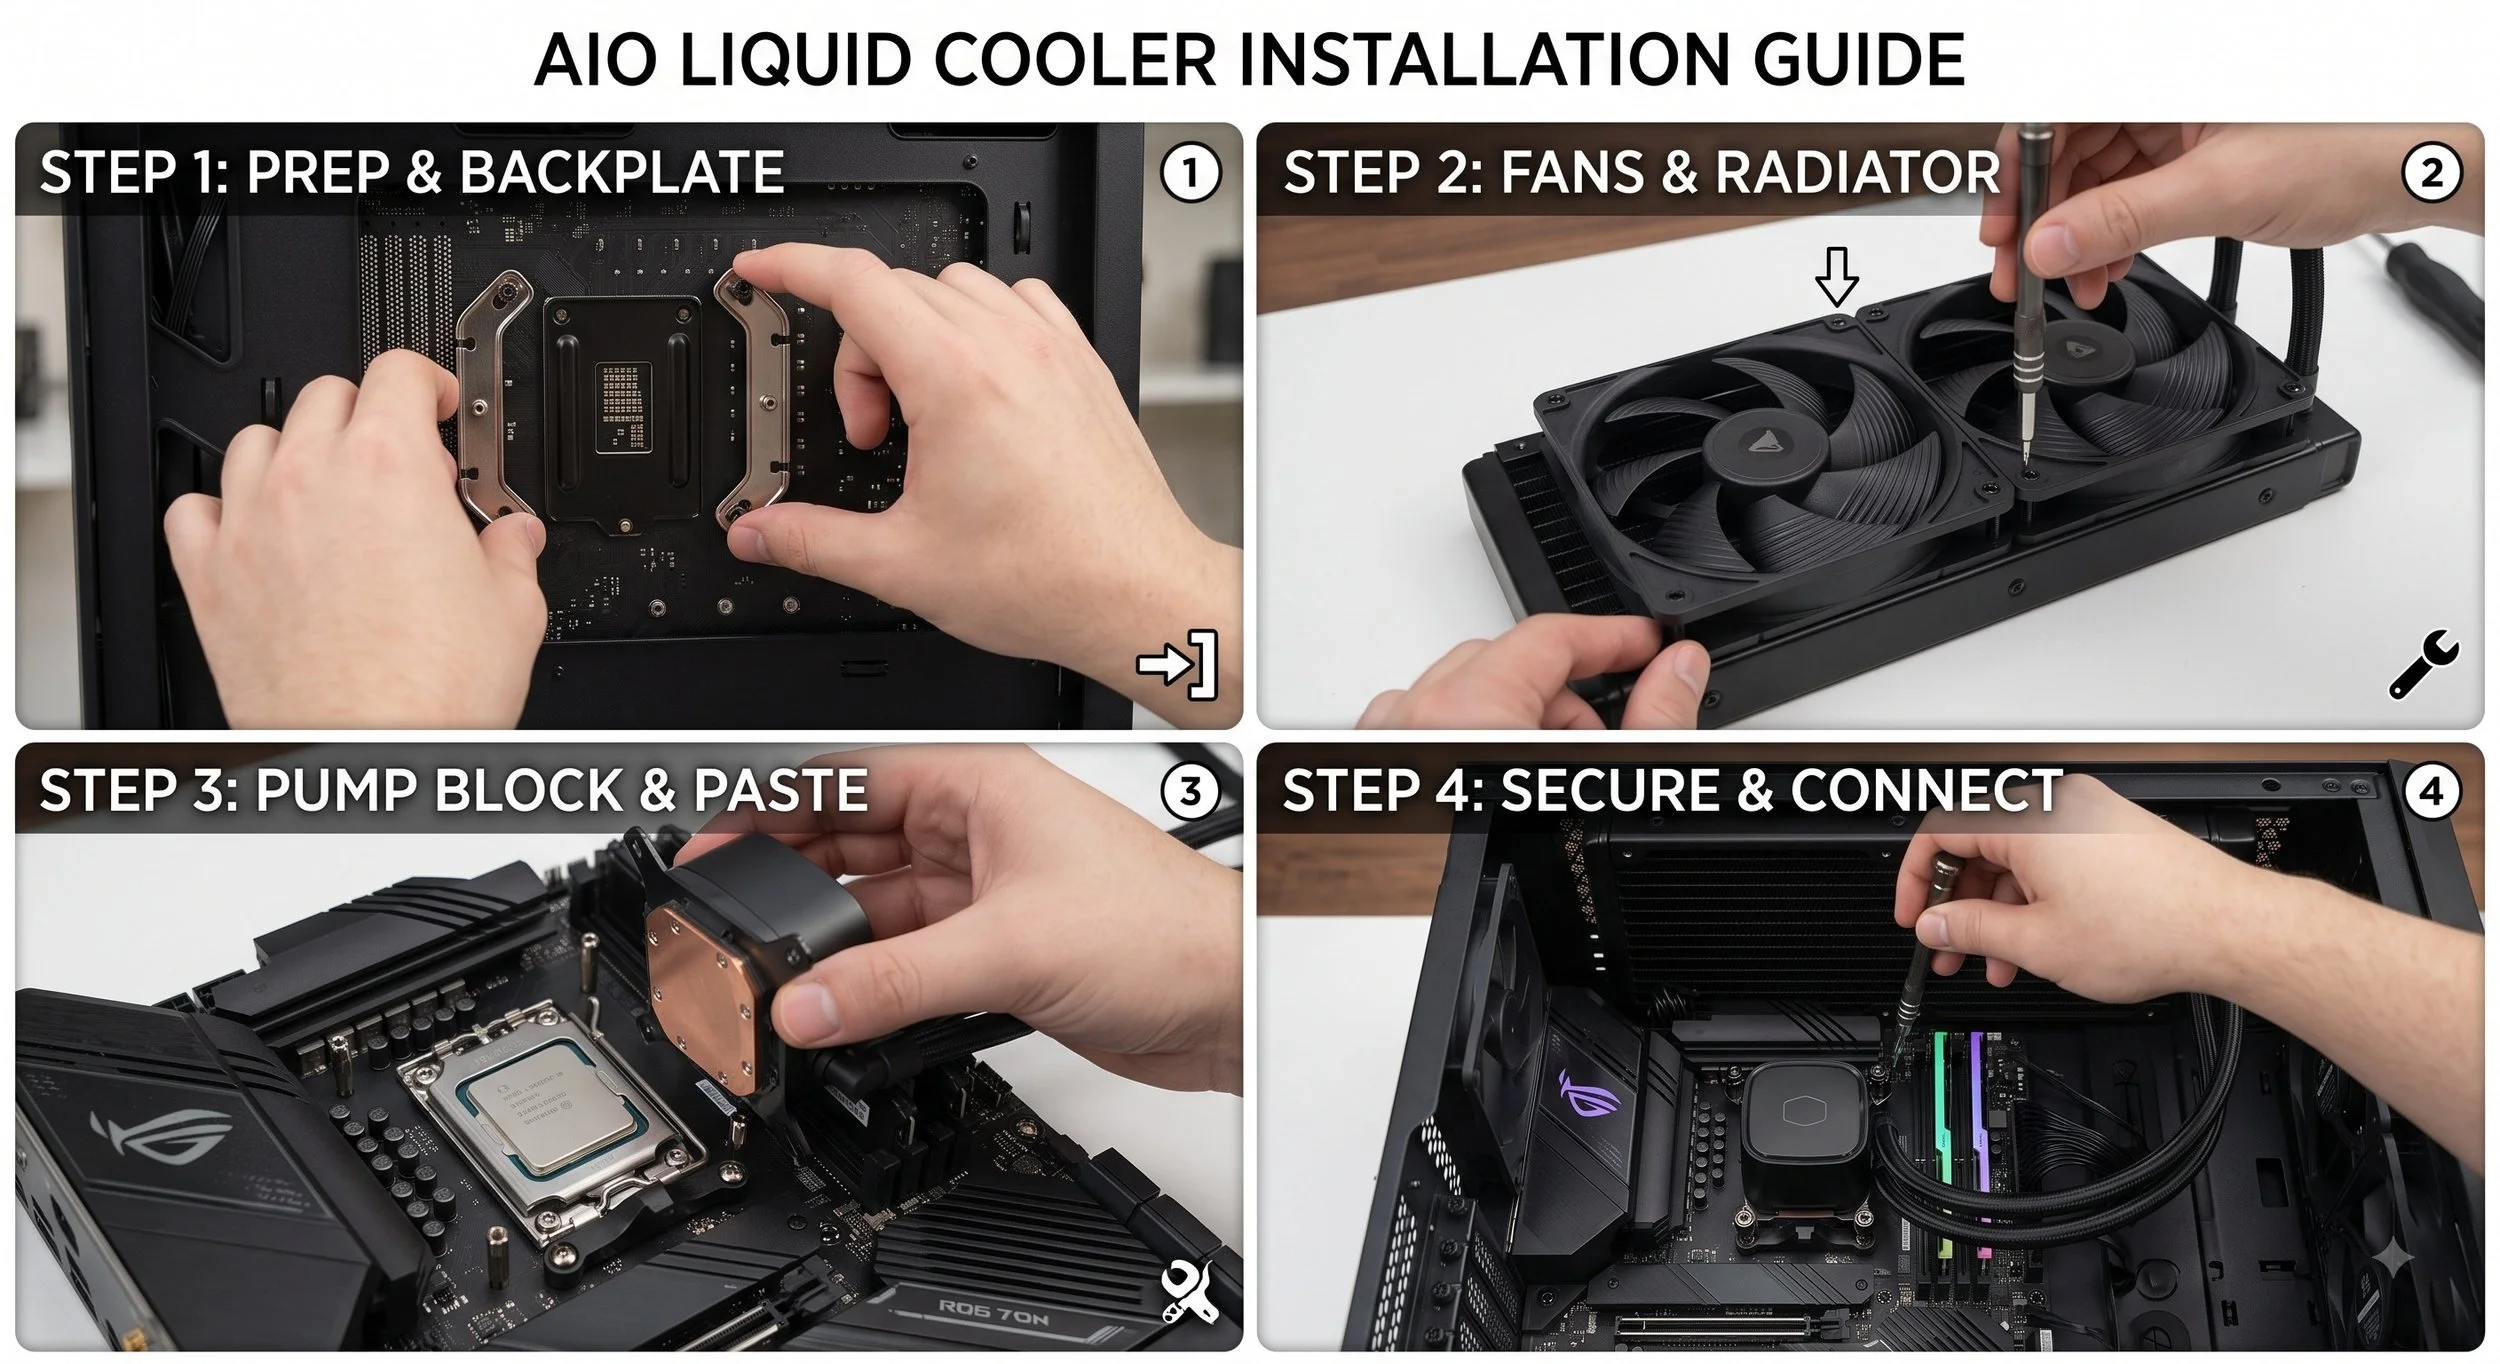
For clean cable routing and easy access, mount the socket backplate and hardware while the motherboard is laid flat on a non-conductive work surface. This means don't place the motherboard in the chassis just yet. Components such as the graphics card and RAM should already be installed on the motherboard.
Prep the motherboard socket by removing any standard plastic stock cooler latches if necessary. Carefully align the cooler's backplate directly on the rear of the motherboard, then thread the designated standoff firmly into the backplate from the front. Use your fingers to tighten all four posts.
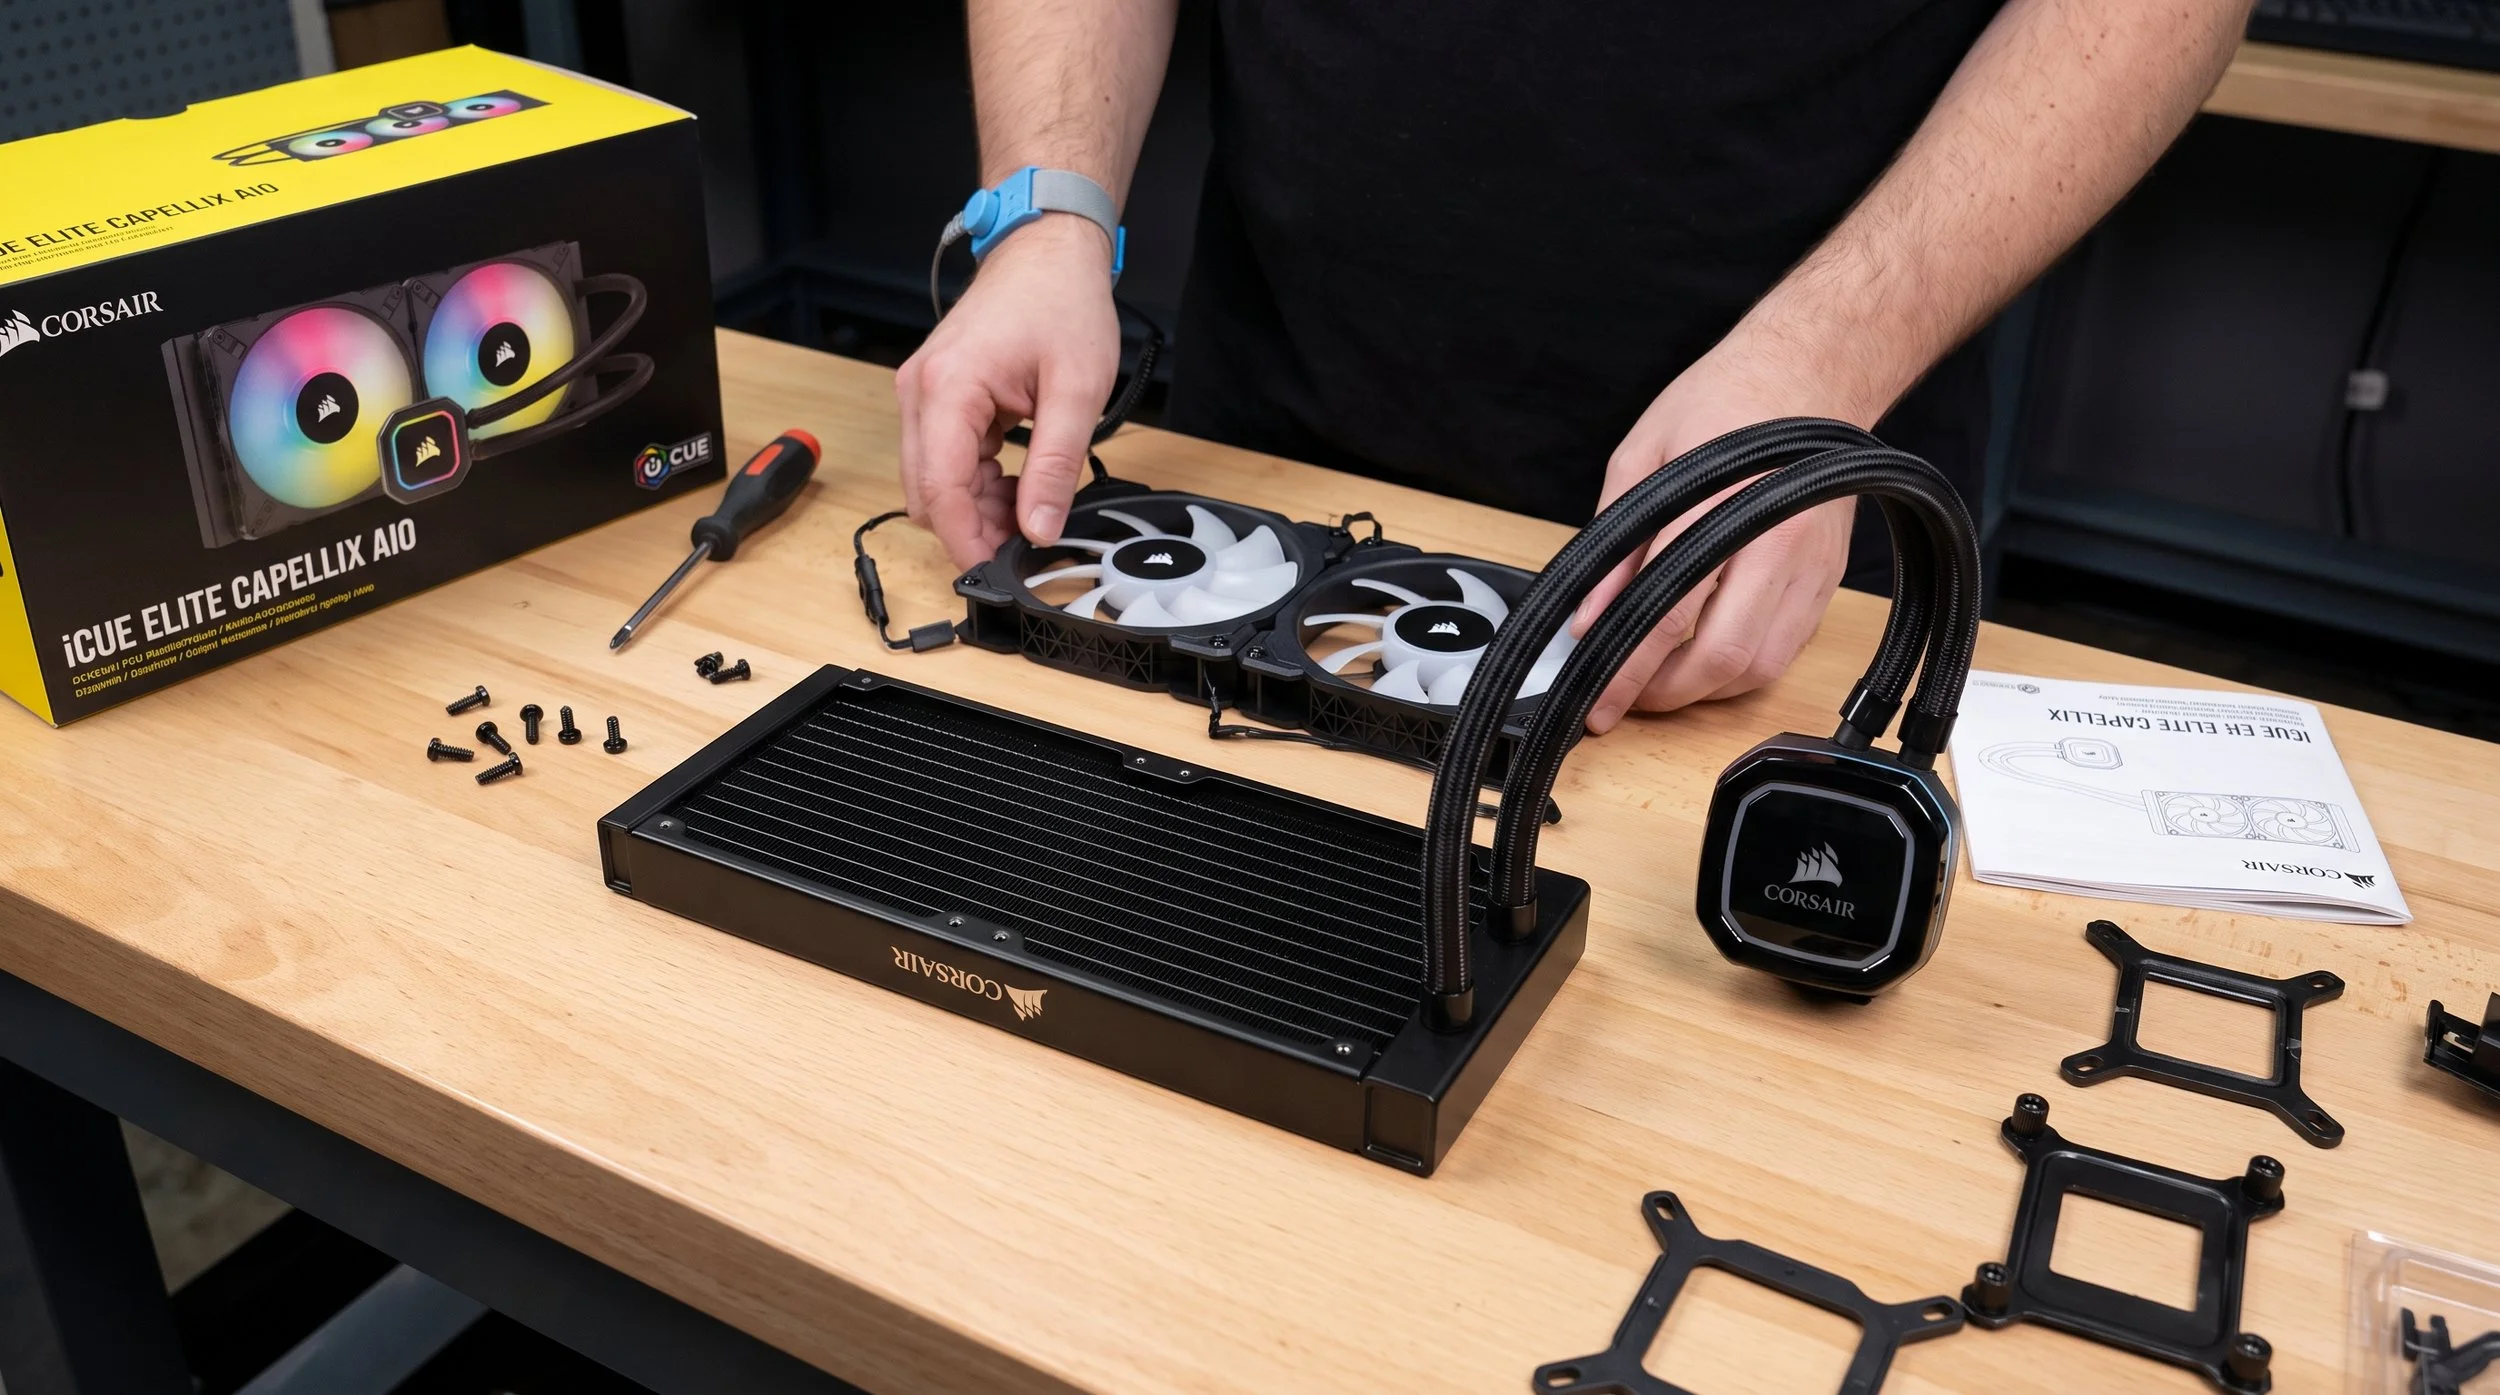
Proceed to attach the fans to the radiator. CAREFULLY align the fans over the radiator frame. Secure them (the fans) with the long screws provided in the kit. Make sure the structural frame spokes of the fans are pointed in the direction you want the air to travel. You have two options: point them towards the rear exhaust or the top of the PC case. Personally, I direct the air through the top of the PC case. This draws hot air away from the components on the motherboard.
Now it is time to mount the radiator assembly to the case. Hold the radiator/fan directly against the internal case rails. Fasten it securely with the short washer-head case screws. Carefully tighten the screws in a cross pattern to prevent uneven twisting of the mounting bracket.
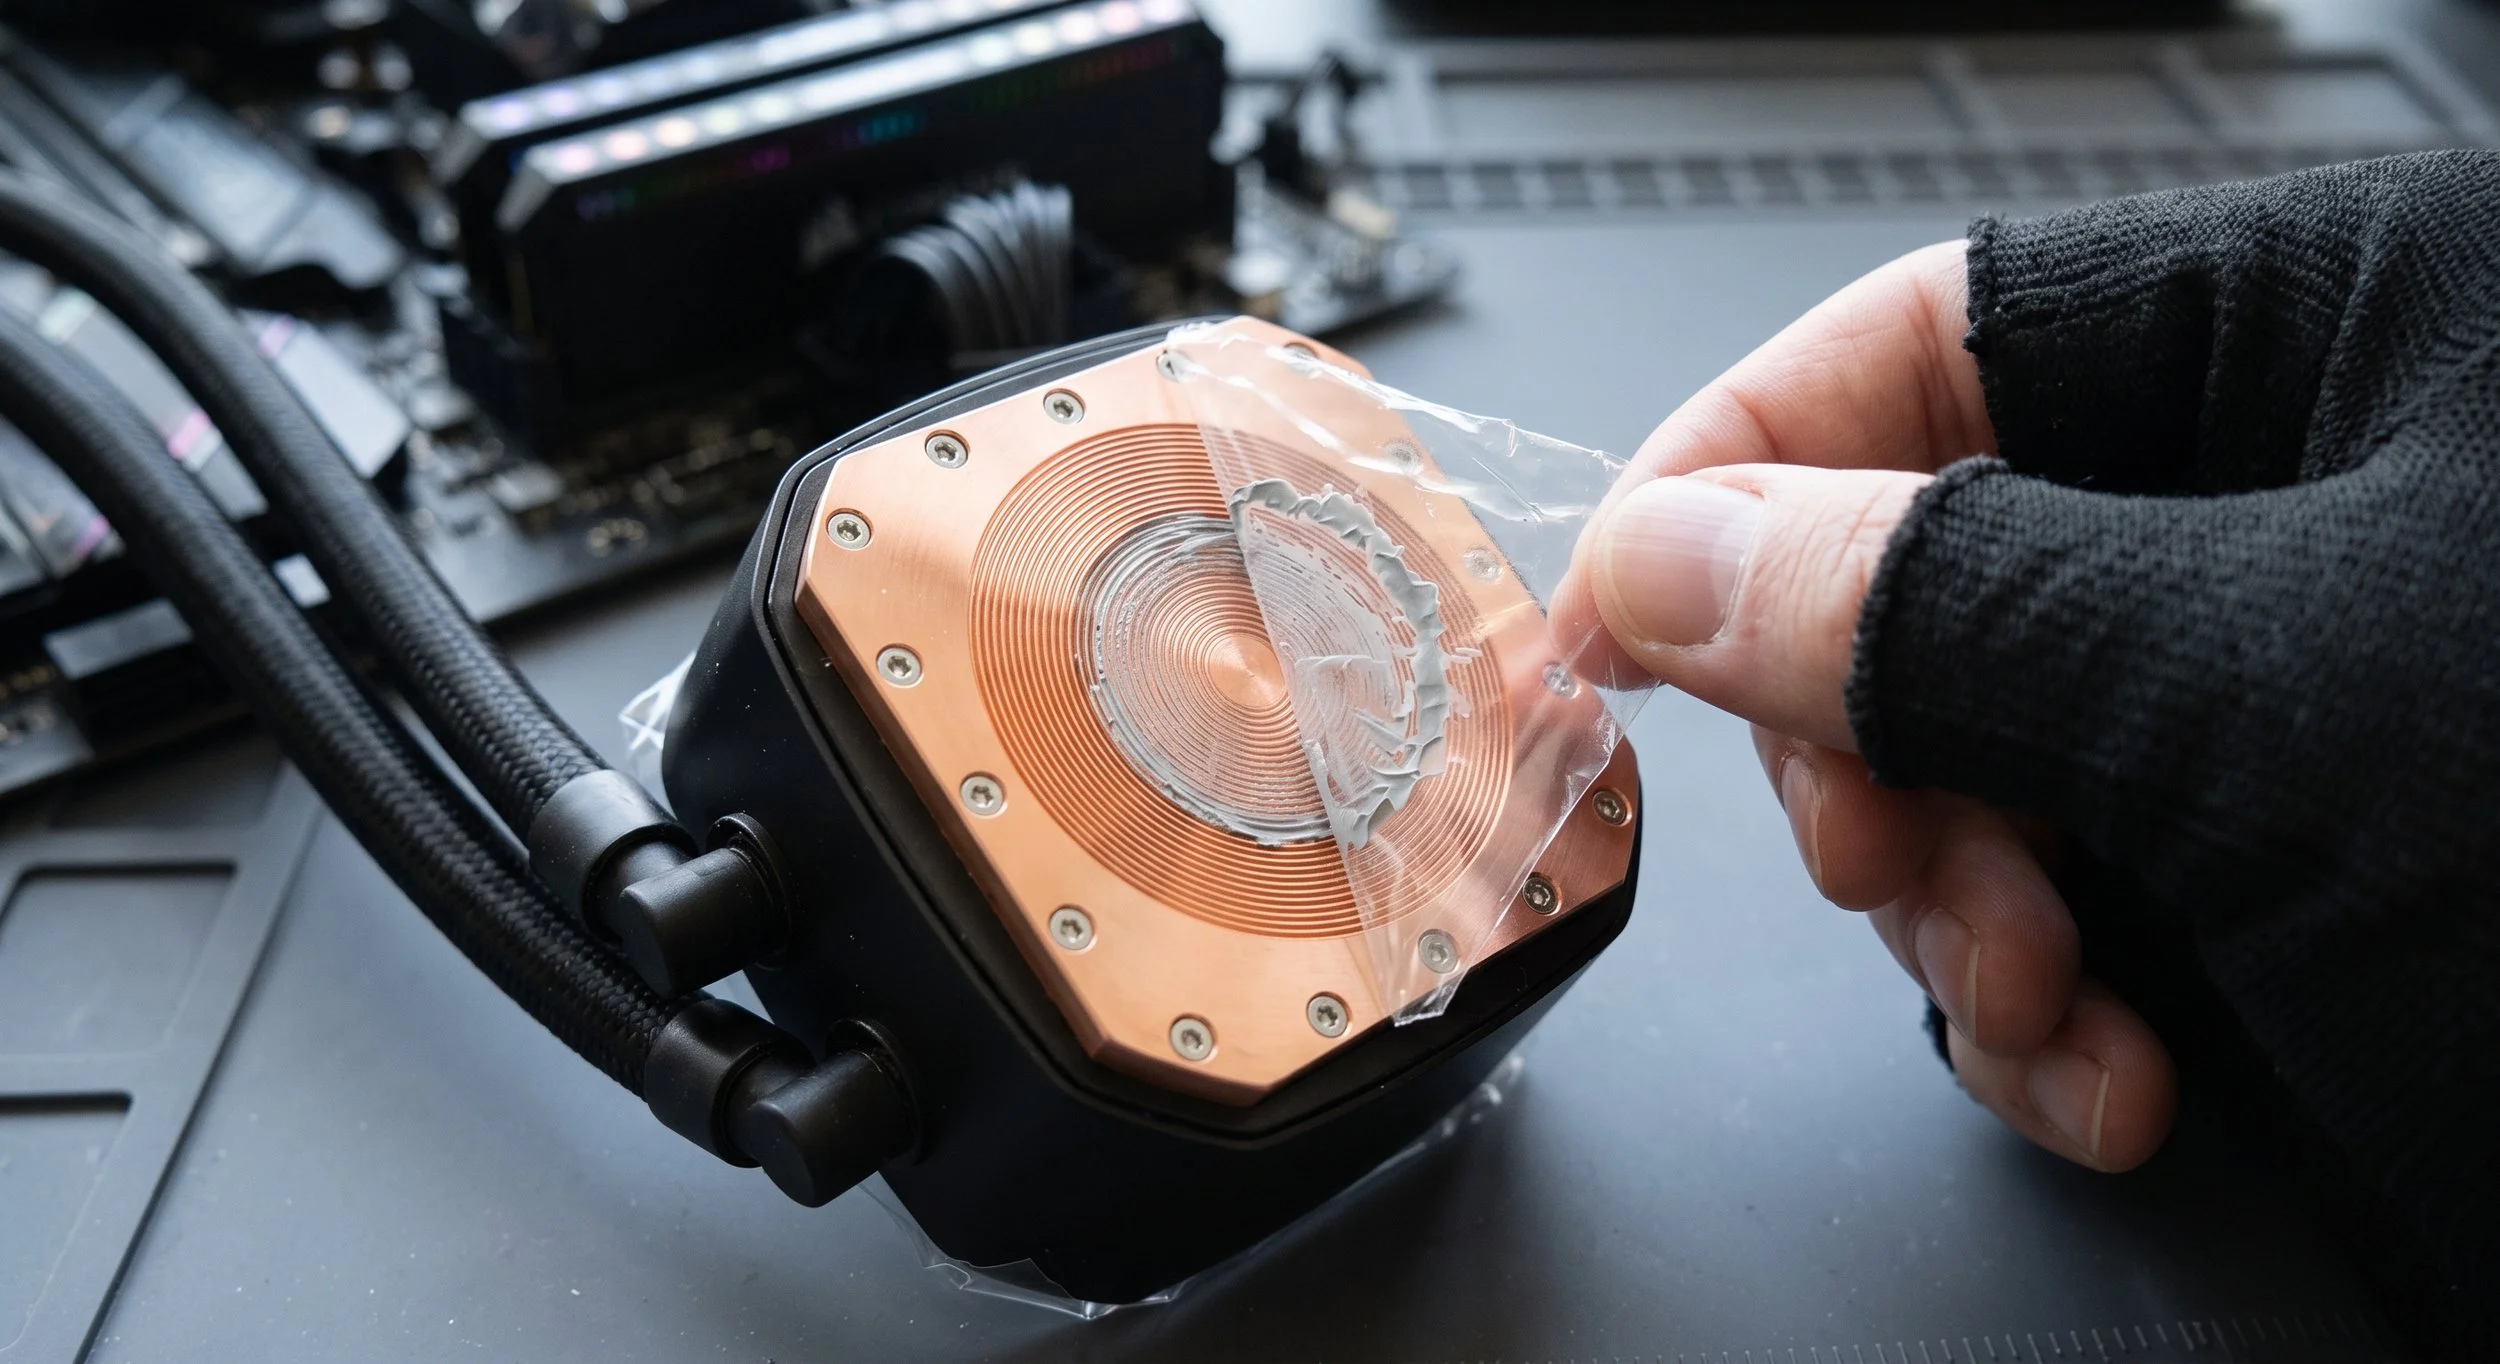
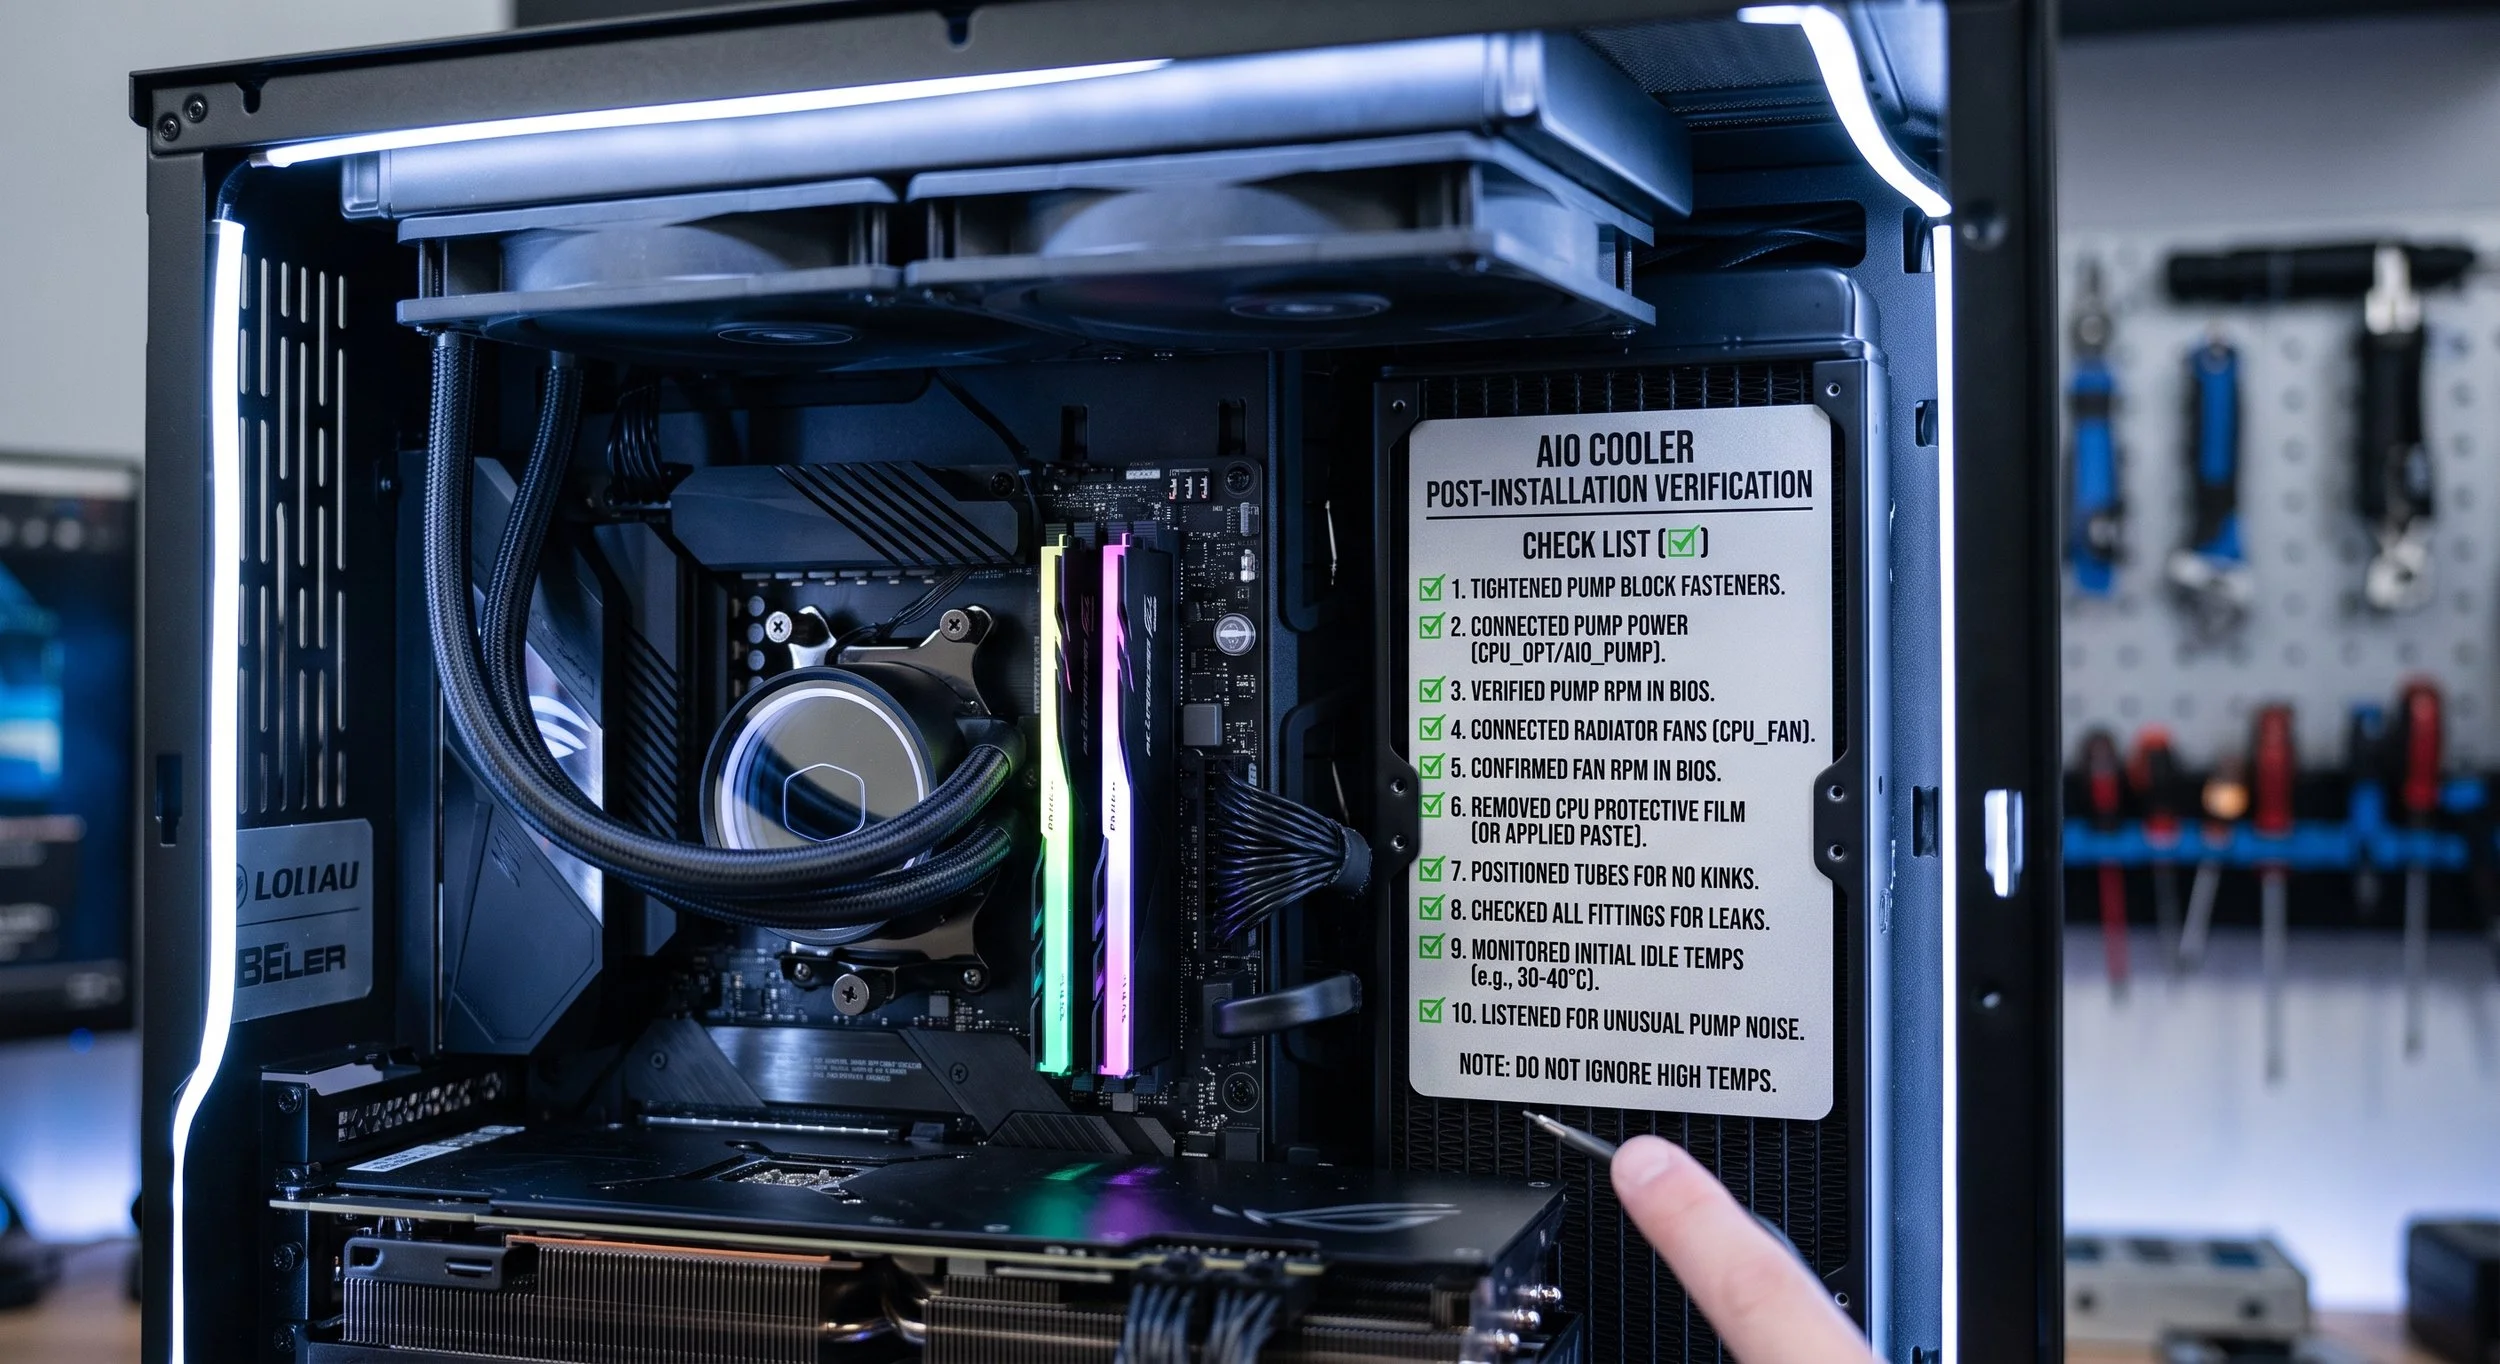
It is imperative to remove the protective Cold-Plate Film. Failure to do so would result in an overheated CPU. Inspect the bottom copper cold plate of the pump block. Peel off the transparent plastic warning label covering the copper surface. Now, if there is no pre-applied thermal paste, place a pea-sized dot of high-grade thermal paste in a letter "X" pattern directly on the CPU heat spreader. Make sure you don't use too much paste; it will create a mess and possibly damage the motherboard.
This is the part where you need to secure the pump block. Align it over the four standoff posts. Thread the spring-loaded thumbscrews onto the standoffs. Slowly tighten in an alternating diagonal pattern, a few turns at a time, until you feel snug. Warning: do not over-torque.
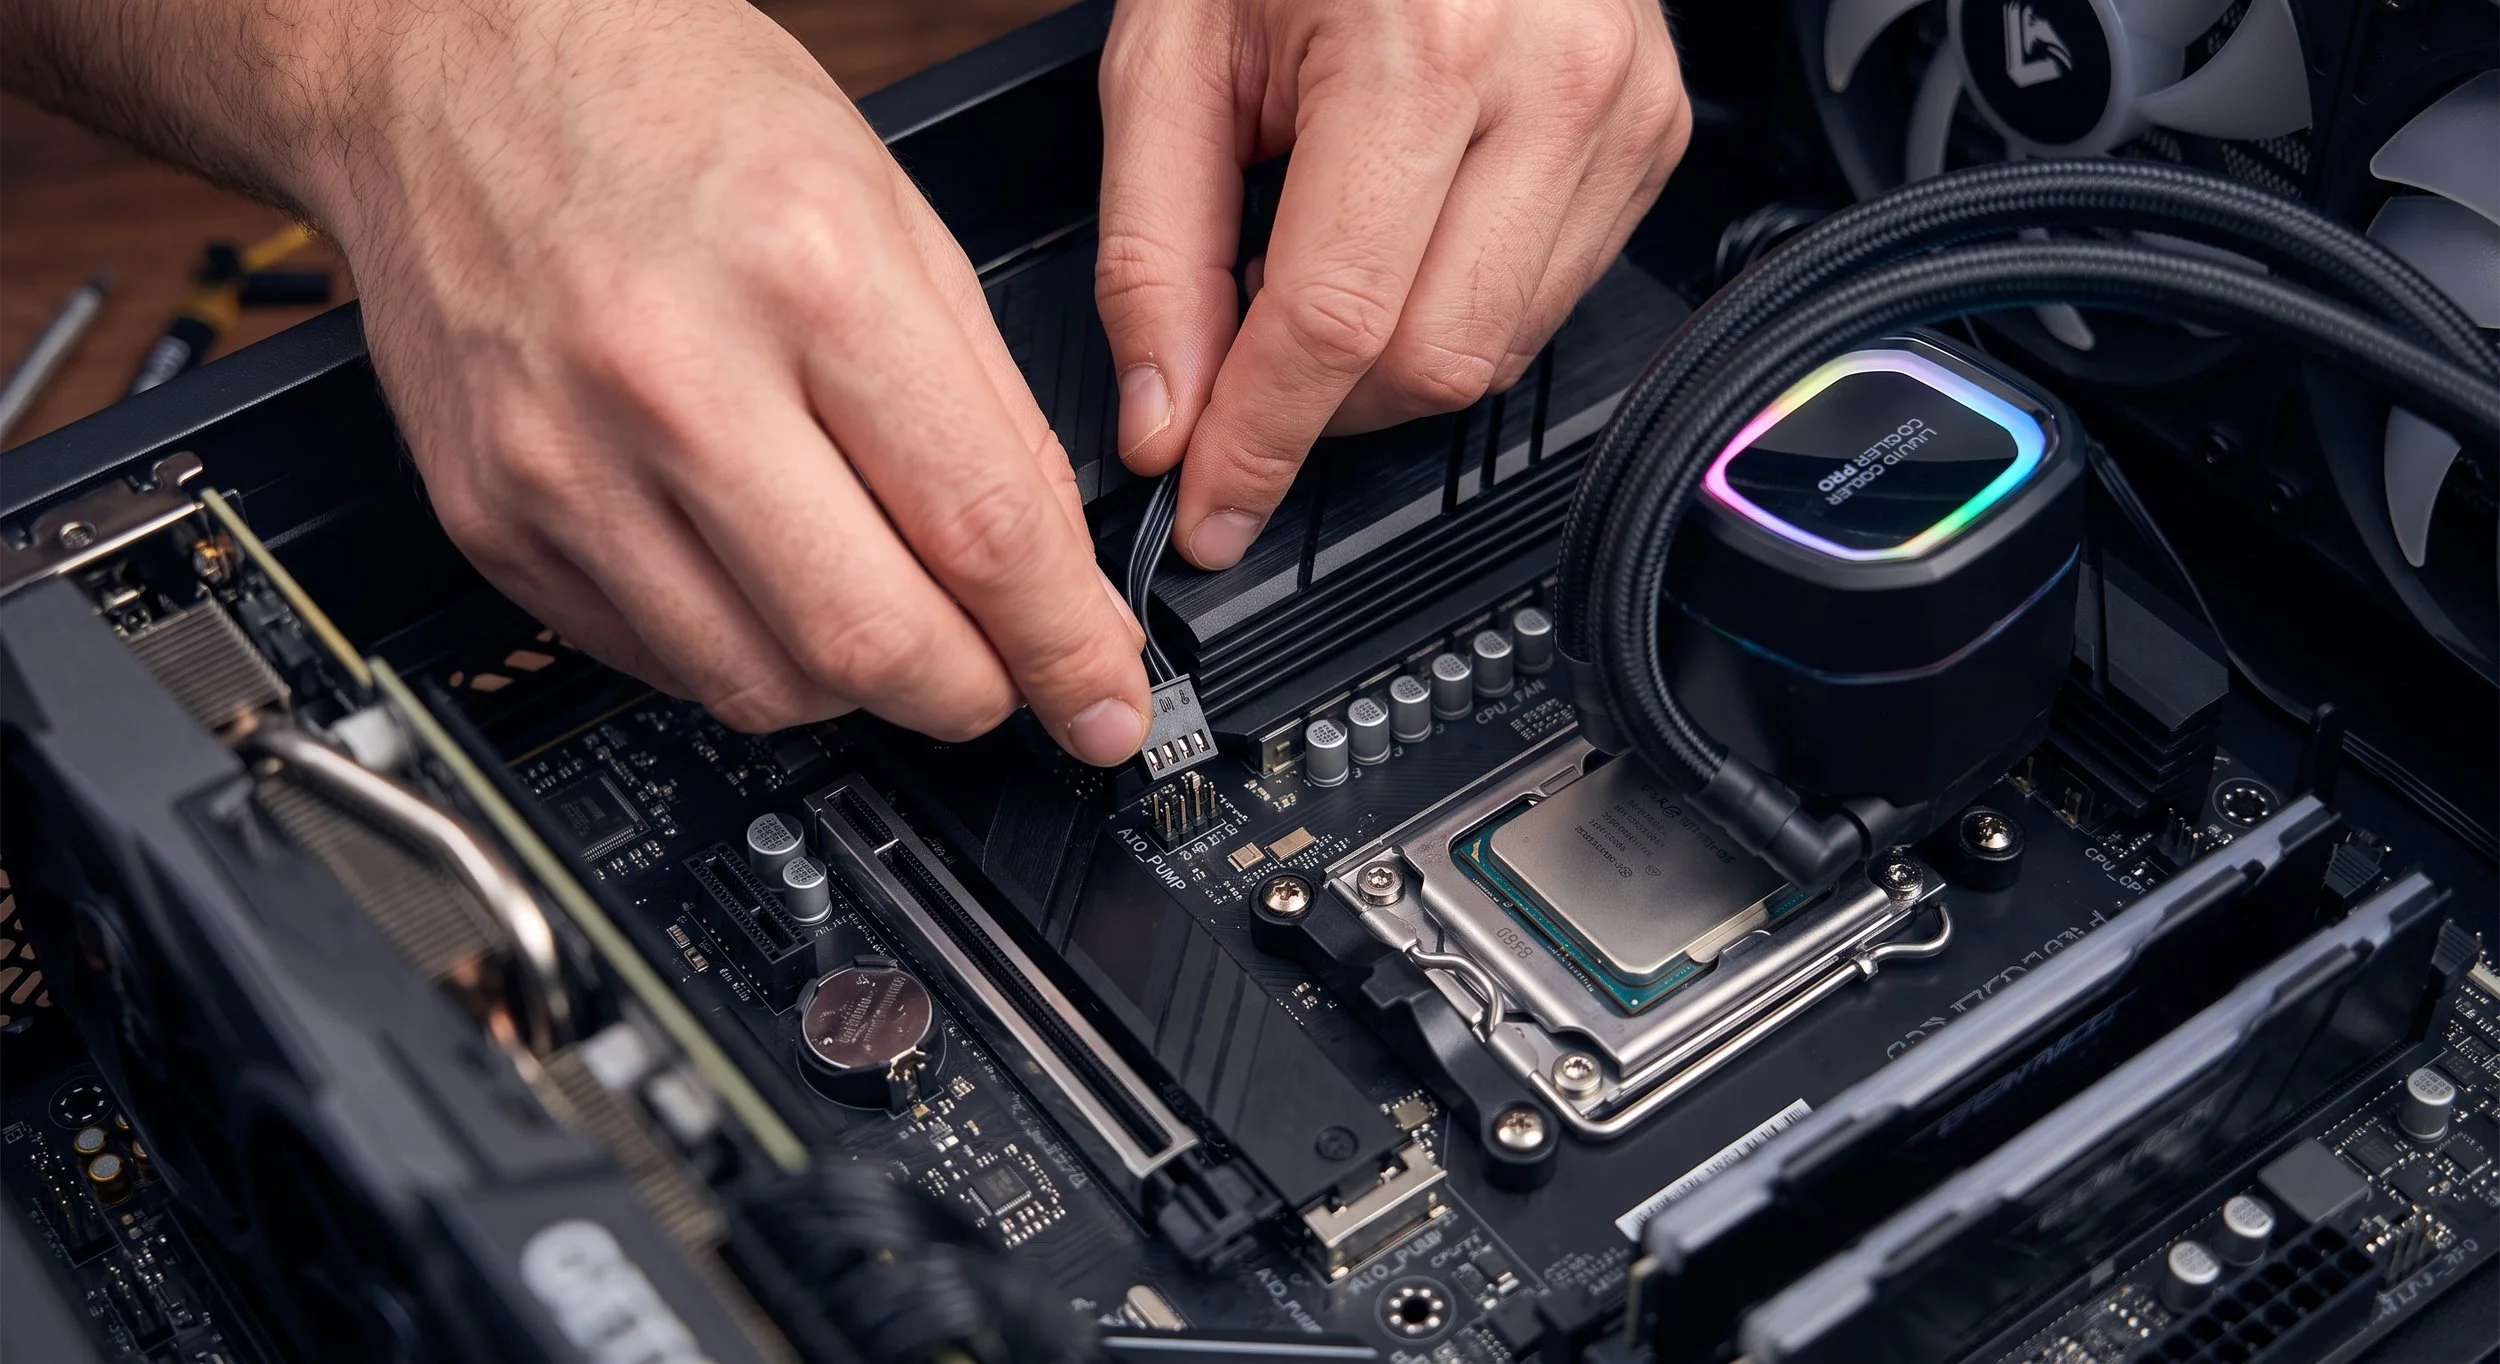
Now we're entering the final stage of physical installation. Plug the pump's 3-pin or 4-pin cable into the motherboard's dedicated AIO_PUMP or PUMP_HEADER. Plug the radiator fan cable into the CPU_FAN header using the provided Y-splitter. Connect any SATA power or internal USB 2.0 cables if your cooler features an LCD screen or custom RGB software.
Post-Installation Inspection
After you complete the installation, it's time to verify that the AIO cooler is s functioning properly. Sort of like a pre-inspection checklist.
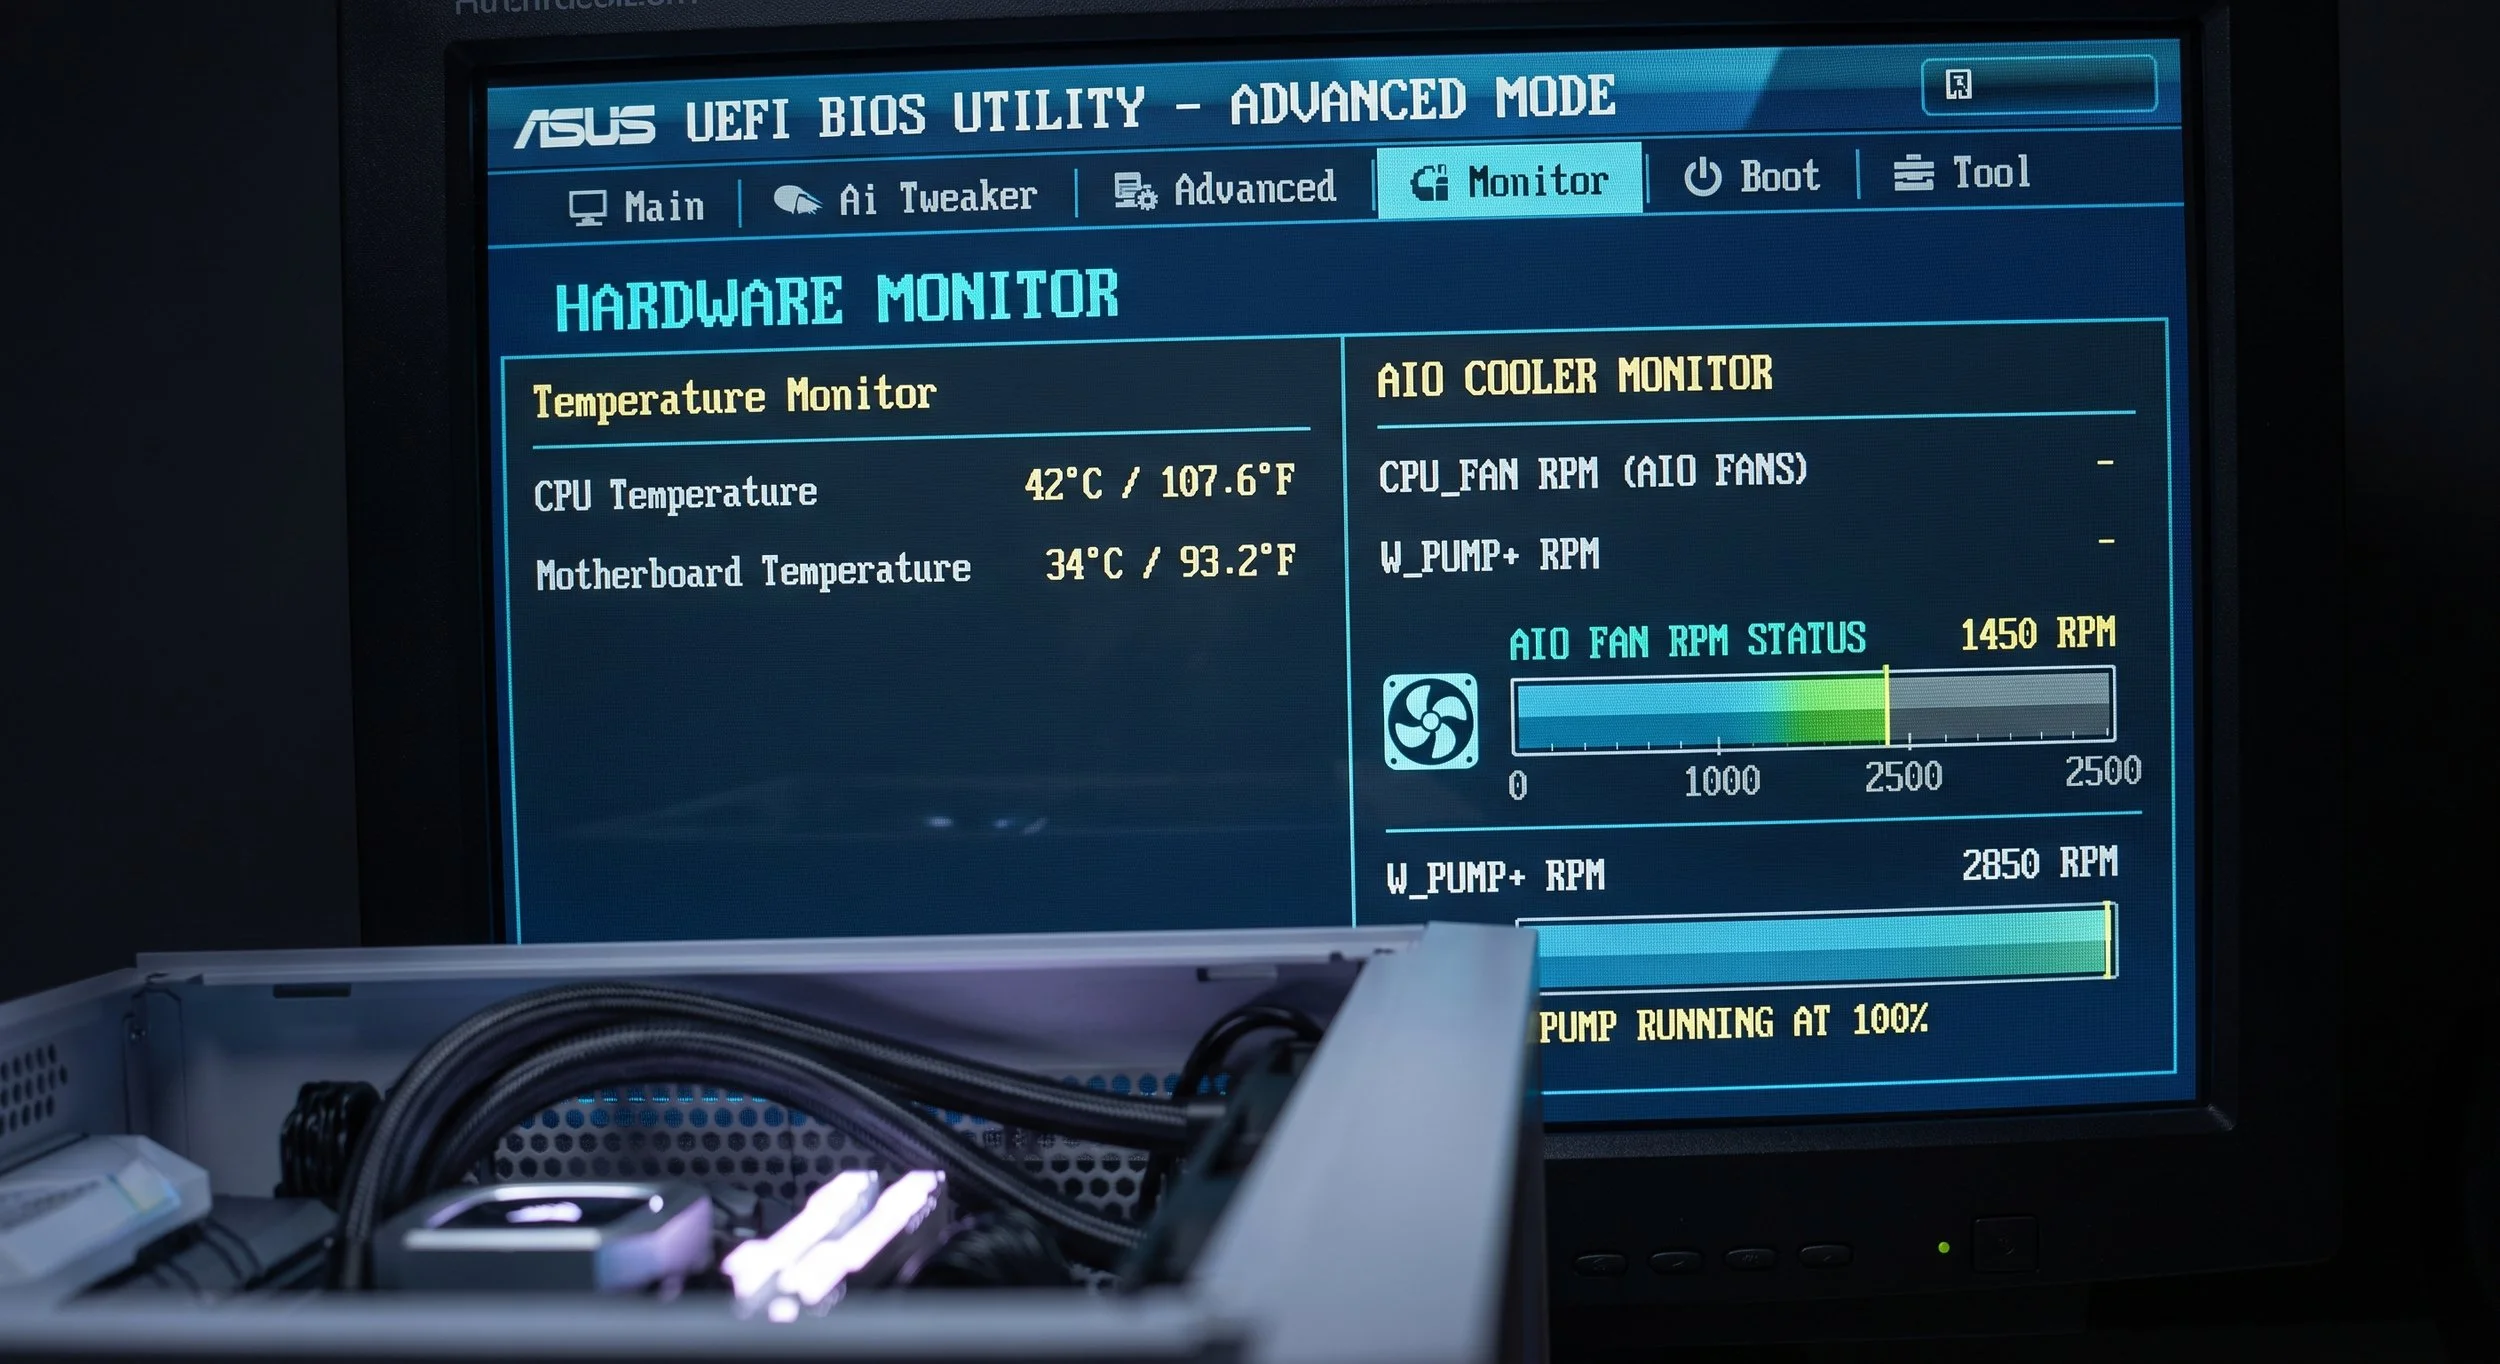
Once you power on your system, immediately enter the BIOS. Navigate to the Hardware Monitor to verify that the pump header shows an Active RPM; it should be operating between 2,000 and 3,200 RPM. Next, monitor idle thermals, meaning verify that idle CPU temperatures are stable between 28 degrees Celsius and 42 degrees Celsius, depending on CPU power output and environmental temperature.
If you notice the readings showing spike temps above 60 degrees Celsius, Houston, we have a problem. I would immediately shut down the system. Now, this could be a variety of issues. You may have forgotten to remove the plastic film off the cold plate; there may be uneven bracket tension, or an unpowered pump. Either way, investigate the issue, even if you have to remove the pump block from the CPU.
Make full use of your hearing and listen out for the pump's noise. If you hear a slight bubbling noise, that is normal for the first few minutes as air settles. However, if gurgling persists, gently tilt the chassis side to side; this will help trapped air escape the pump chamber and settle in the top radiator reservoir.
Next, monitor idle thermals, meaning verify that idle CPU temperatures are stable between 28 degrees Celsius and 42 degrees Celsius, depending on CPU power output and environmental temperature.
If you notice the readings showing spike temps above 60 degrees Celsius, Houston, we have a problem. I would immediately shut down the system. Now, this could be a variety of issues. You may have forgotten to remove the plastic film off the cold plate; there may be uneven bracket tension, or an unpowered pump.
Make full use of your hearing and listen for the pump's noise. If you hear a slight bubbling noise, that is normal for the first few minutes as air settles. However, if gurgling persists, gently tilt the chassis side to side while trying to free any trapped air.
My Top Three AIO Coolers
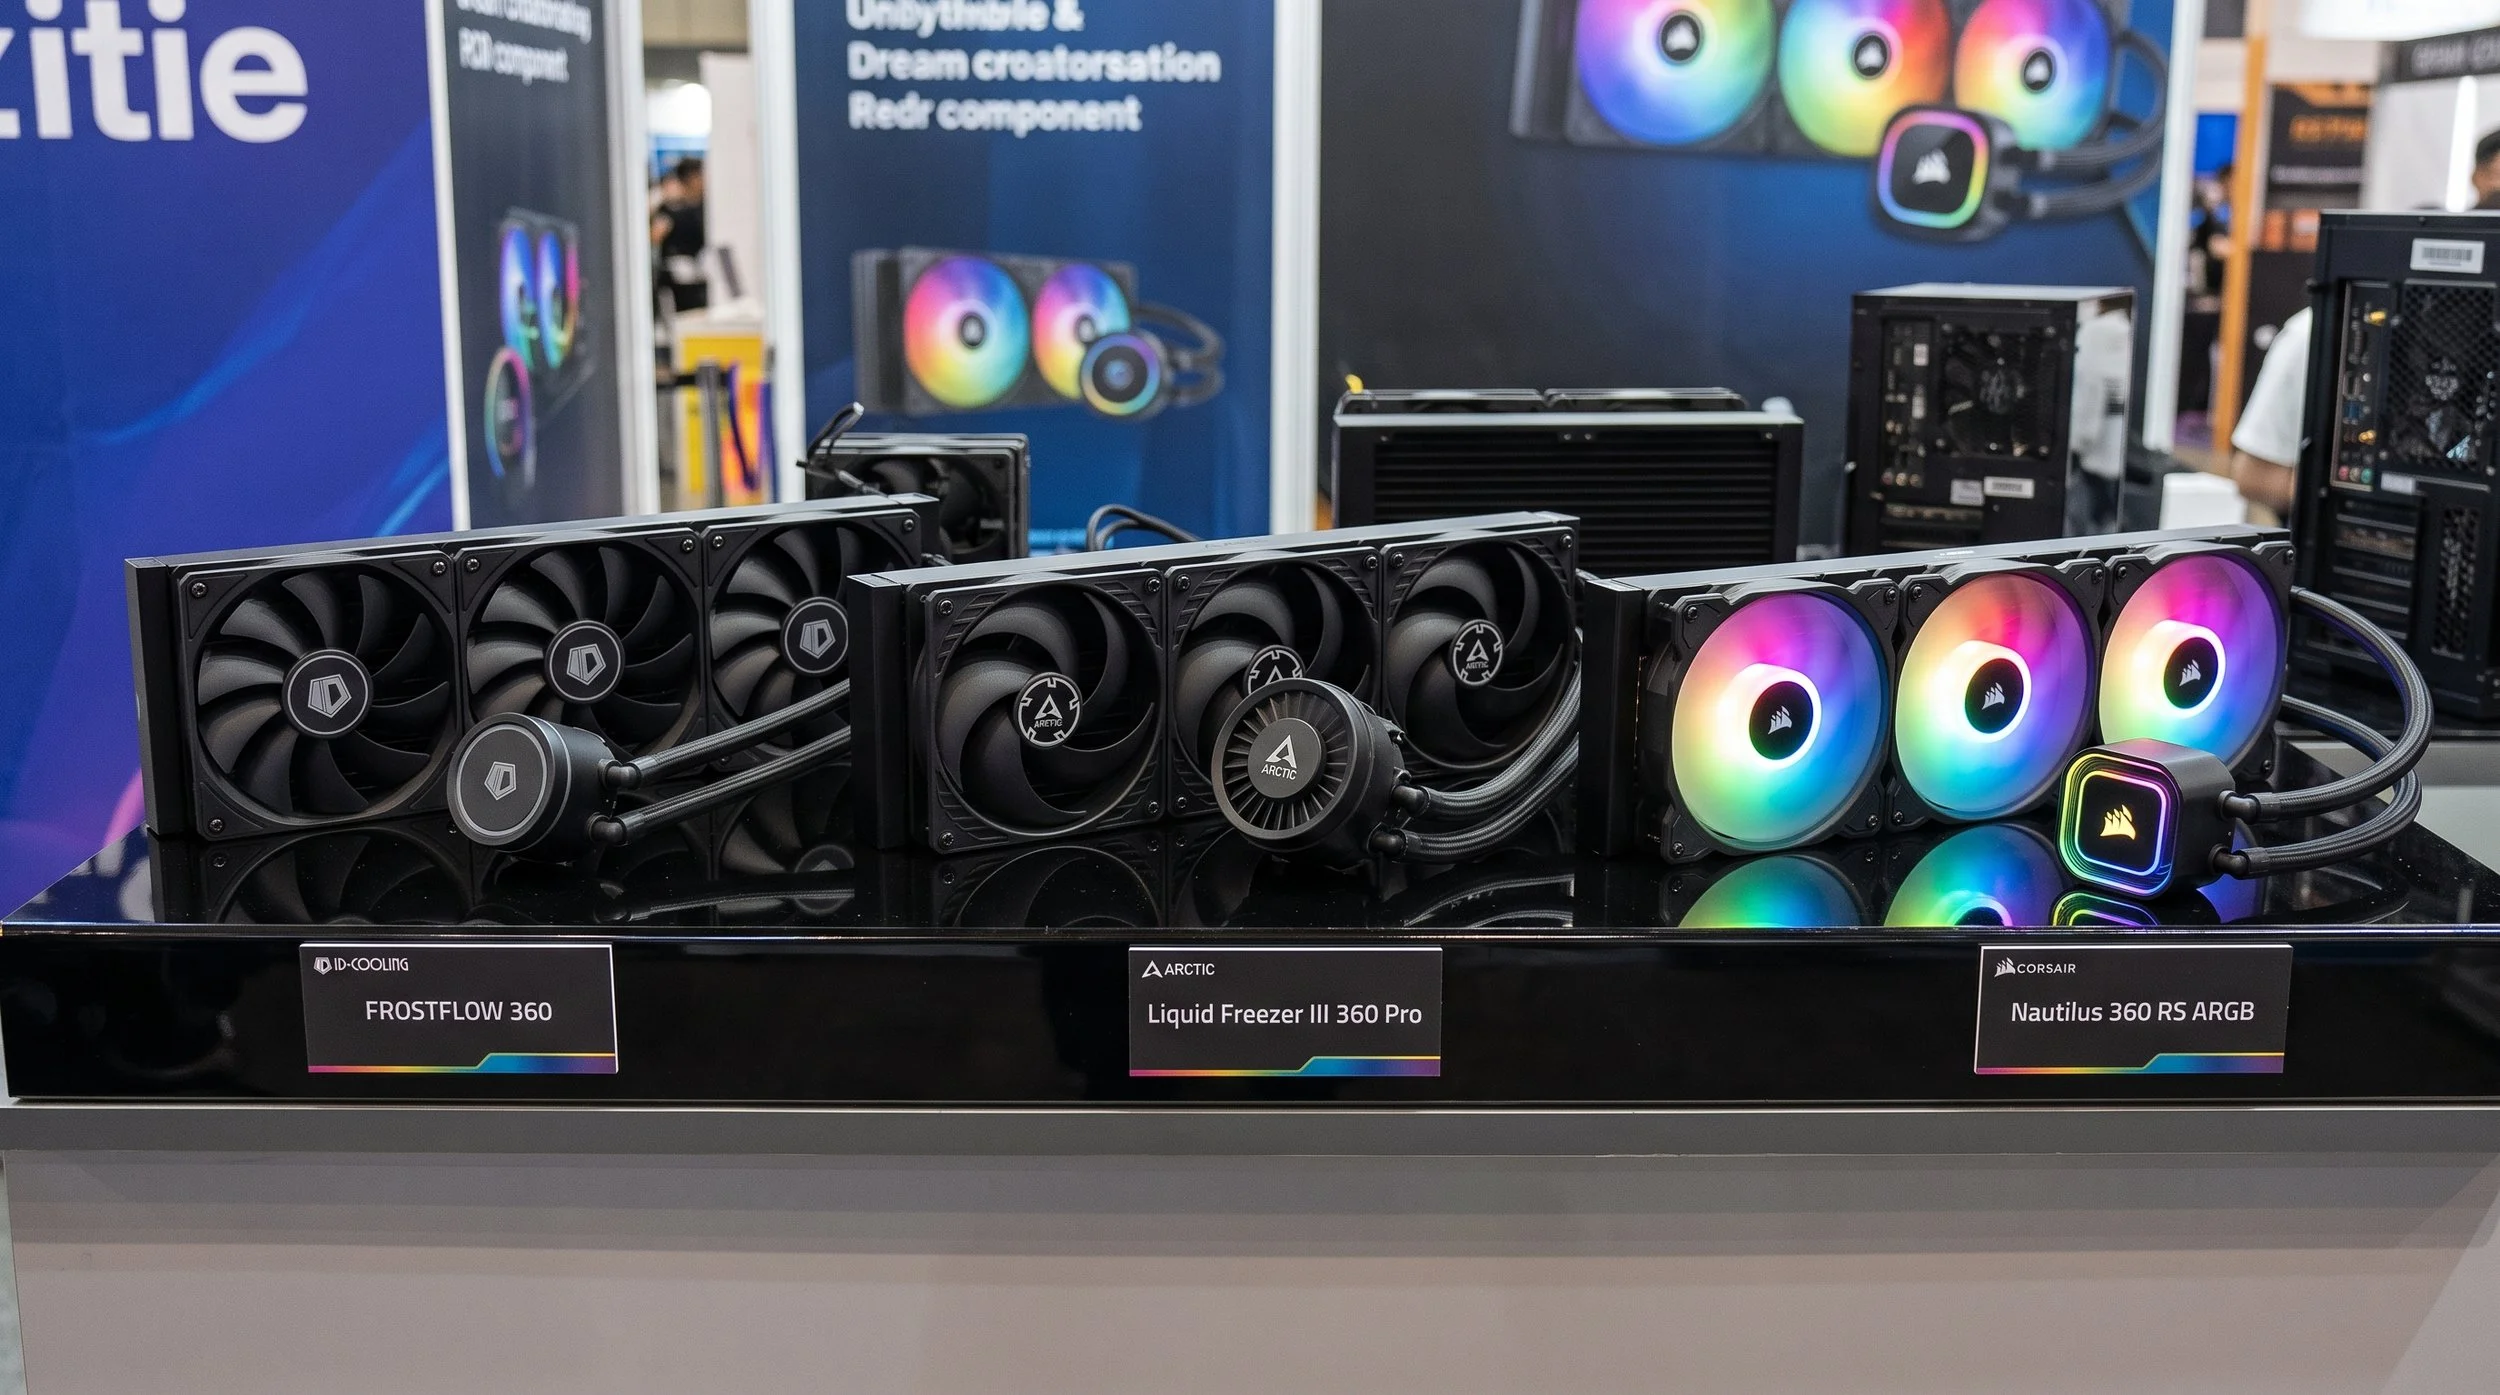
ID-Cooling Frostflow X 240 240MM AIO CPU Cooler, White LED, $54.99, Amazon.
ARTIC Liquid Freezer 3 Pro 360 A-RGB AIO CPU Cooler 360mm $76.99, Amazon
Corsair Nautilus 360 RS ARGB Liquid CPU Cooler 360mm AIO Low Noise
Let’s Conclude This Tutorial
A successful AIO cooler installation ultimately relies on three main factors: proper loop orientation, even thermal contact, and correct power delivery. Adhering to these core principles will ensure proper cooling performance and hardware longevity. Good luck.