Here's How to Properly Install an NVMe M.2 SSD and Not Mess It Up
Installing an NVMe M.2 SSD is probably one of the easiest hardware installs you can make, but, like most components, if installed incorrectly, it could reduce system performance. That's why you need to take critical steps to get it right to avoid damaging your hardware.
Here is a step-by-step guide to installing the NWMe M.2 SSD properly and safely.
Safely Prep Your Drive
Before you even think about touching your drive, prepare your workspace (as you should with any hardware) to eliminate the risk of static discharge or short-circuiting.
Firstly, power down your system completely. Flip the switch on the back of the power supply unit (PSU) to the O position, and unplug the power cable from the wall. Drain any residual power from your system by pressing and holding the PC's case power button for approximately 10 seconds to drain any remaining electricity stored in the motherboard's capacitors. Touch any metal surface, including the metal part of the PC case or a metal doorknob. At the same time, it's plugged into a grounded outlet (before unplugging), or work in an area without carpet to prevent static buildup.
Now it's time to locate the M.2 slot on the motherboard. If you have a board with multiple slots, check your motherboard manual. The top slot closest to the CPU usually connects directly to the processor lanes, offering higher data throughput.
The Crucial Step: Check The Standoff
The primary mistake people make is messing up the standoff or the small hex screw that keeps the SSD from lifting off the motherboard. Locate the M.2 slot on the motherboard; you should see a pre-installed standoff at the 2280 mark (the length of standard NVMe drives). If you see it, so far so good.
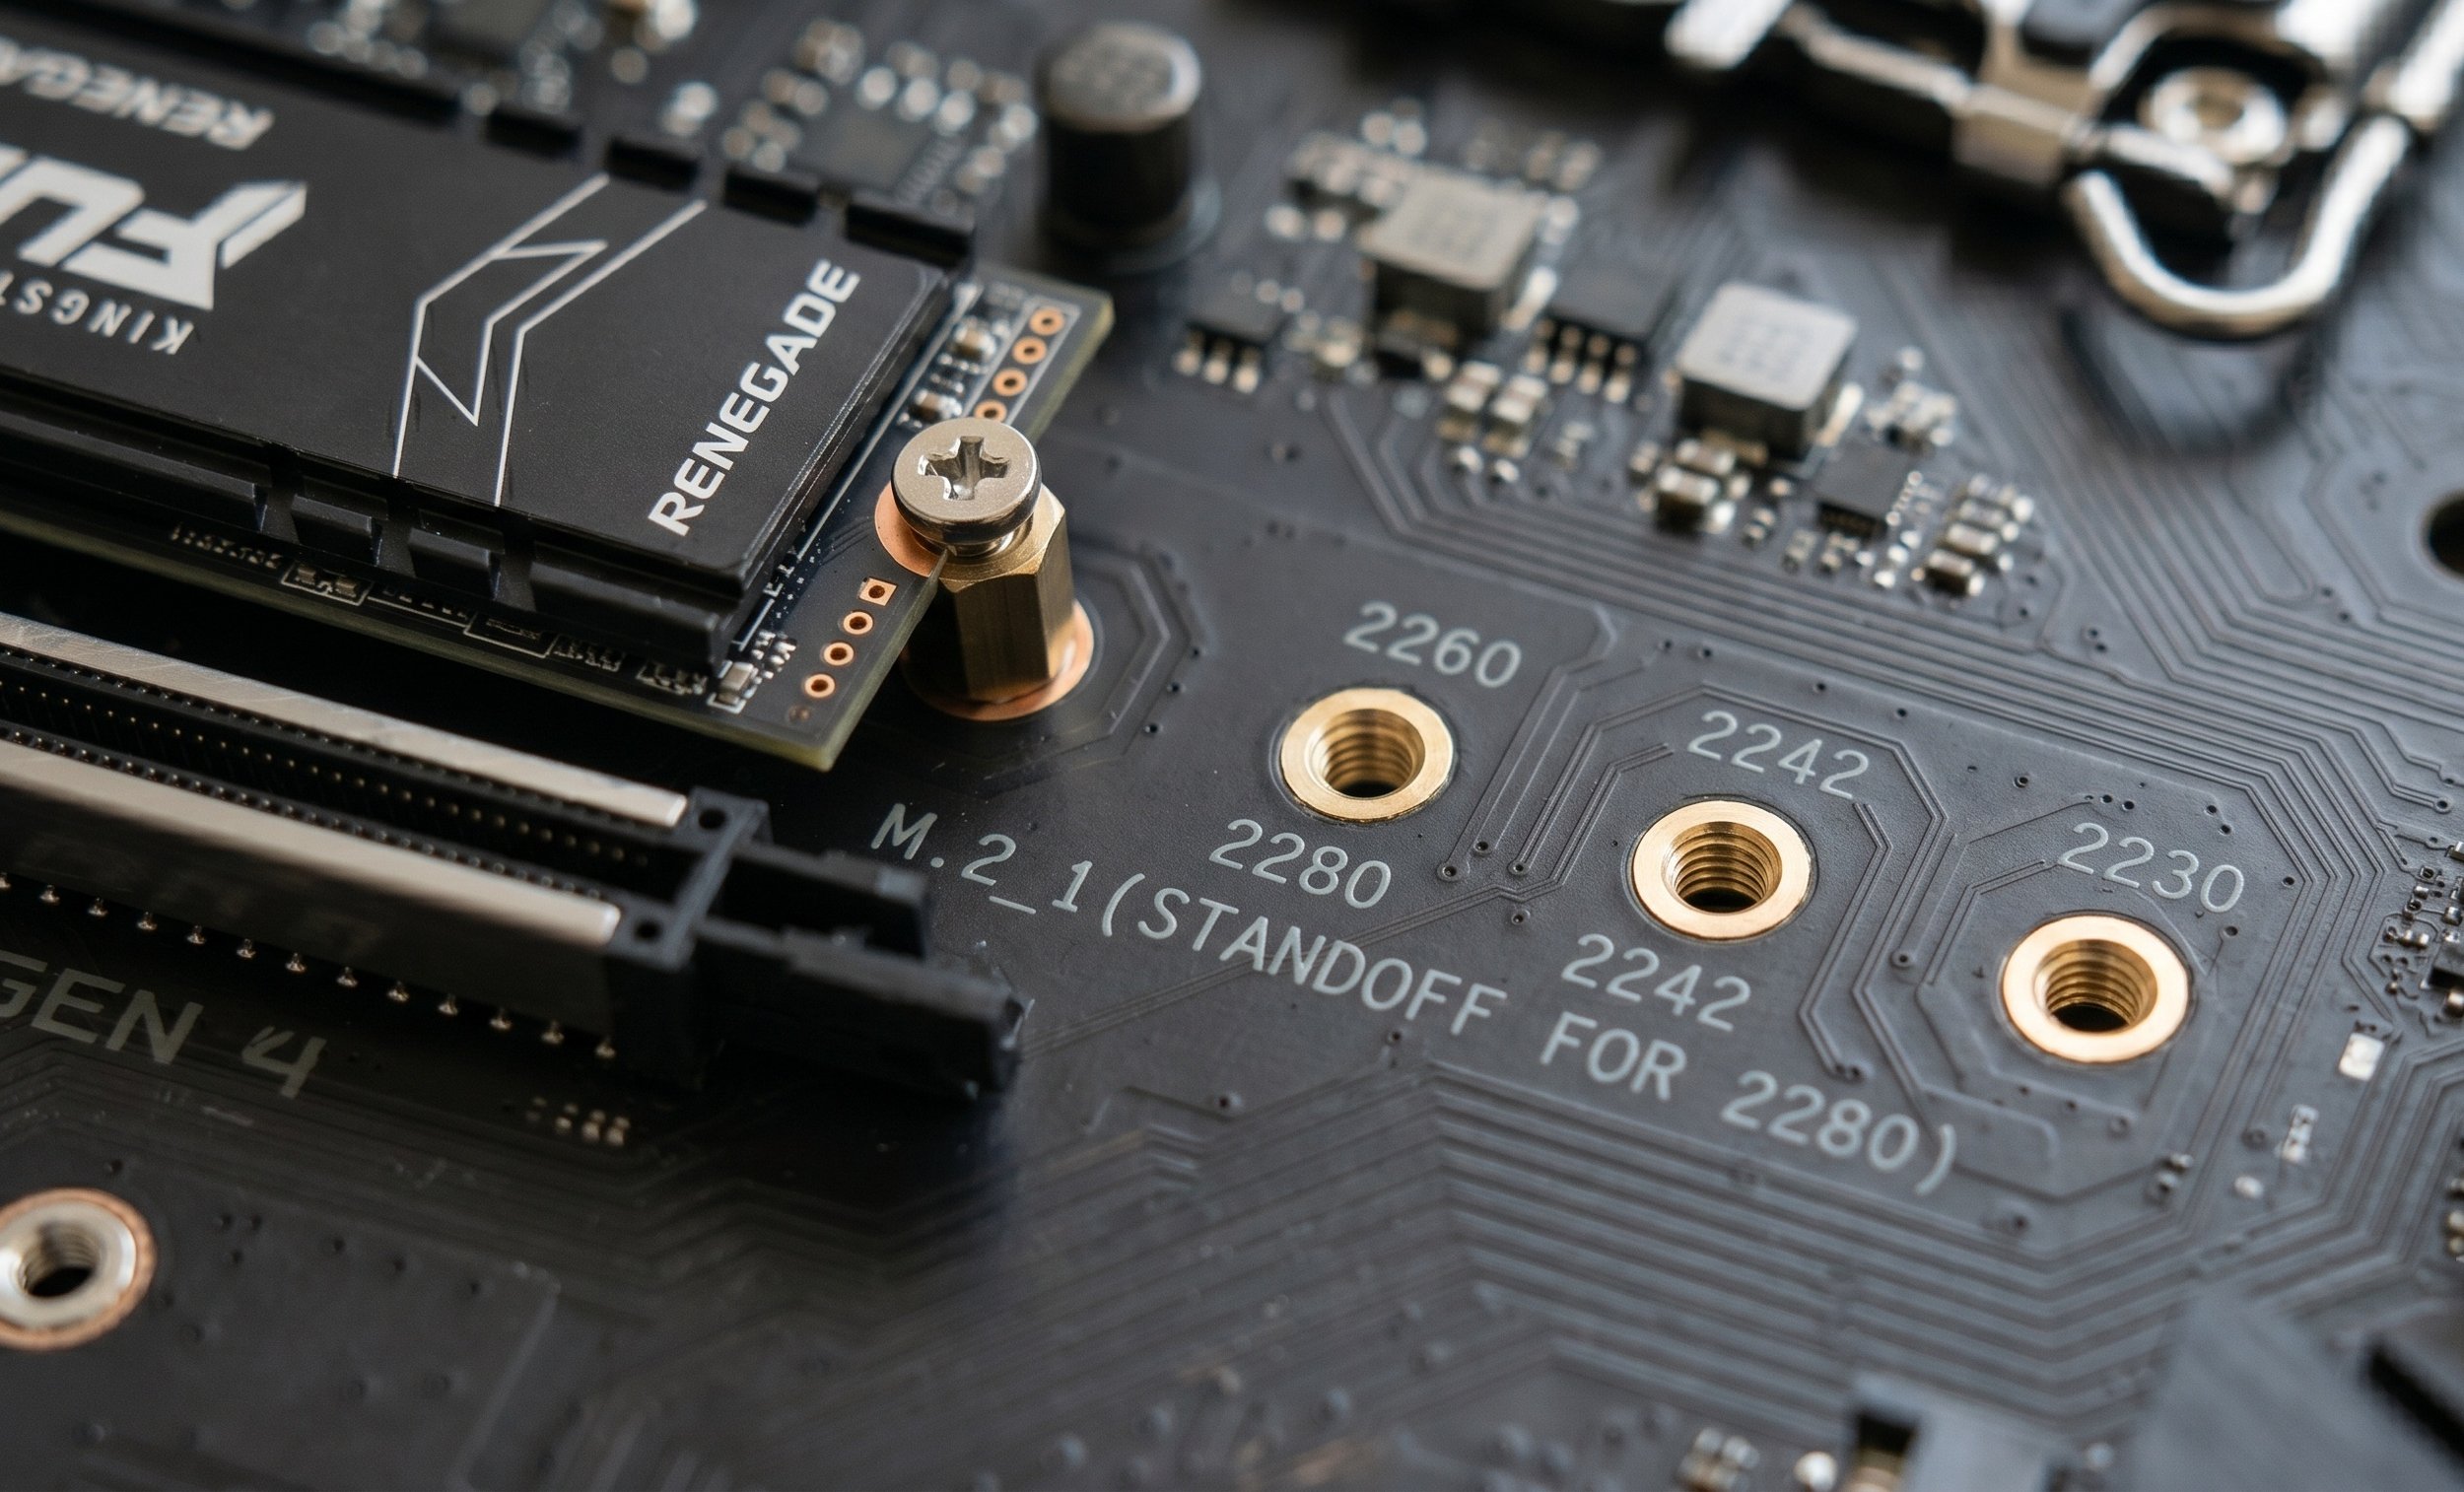
Adjust the standoff as needed: if it's in a different hole, like 2260 or 2242, unscrew it and move it to the 2280 hole. Never, I mean never, screw down and flat-mount the SSD directly to the motherboard surface without the standoff. Doing so will bend and permanently damage the drive or the slot itself when it is powered on.
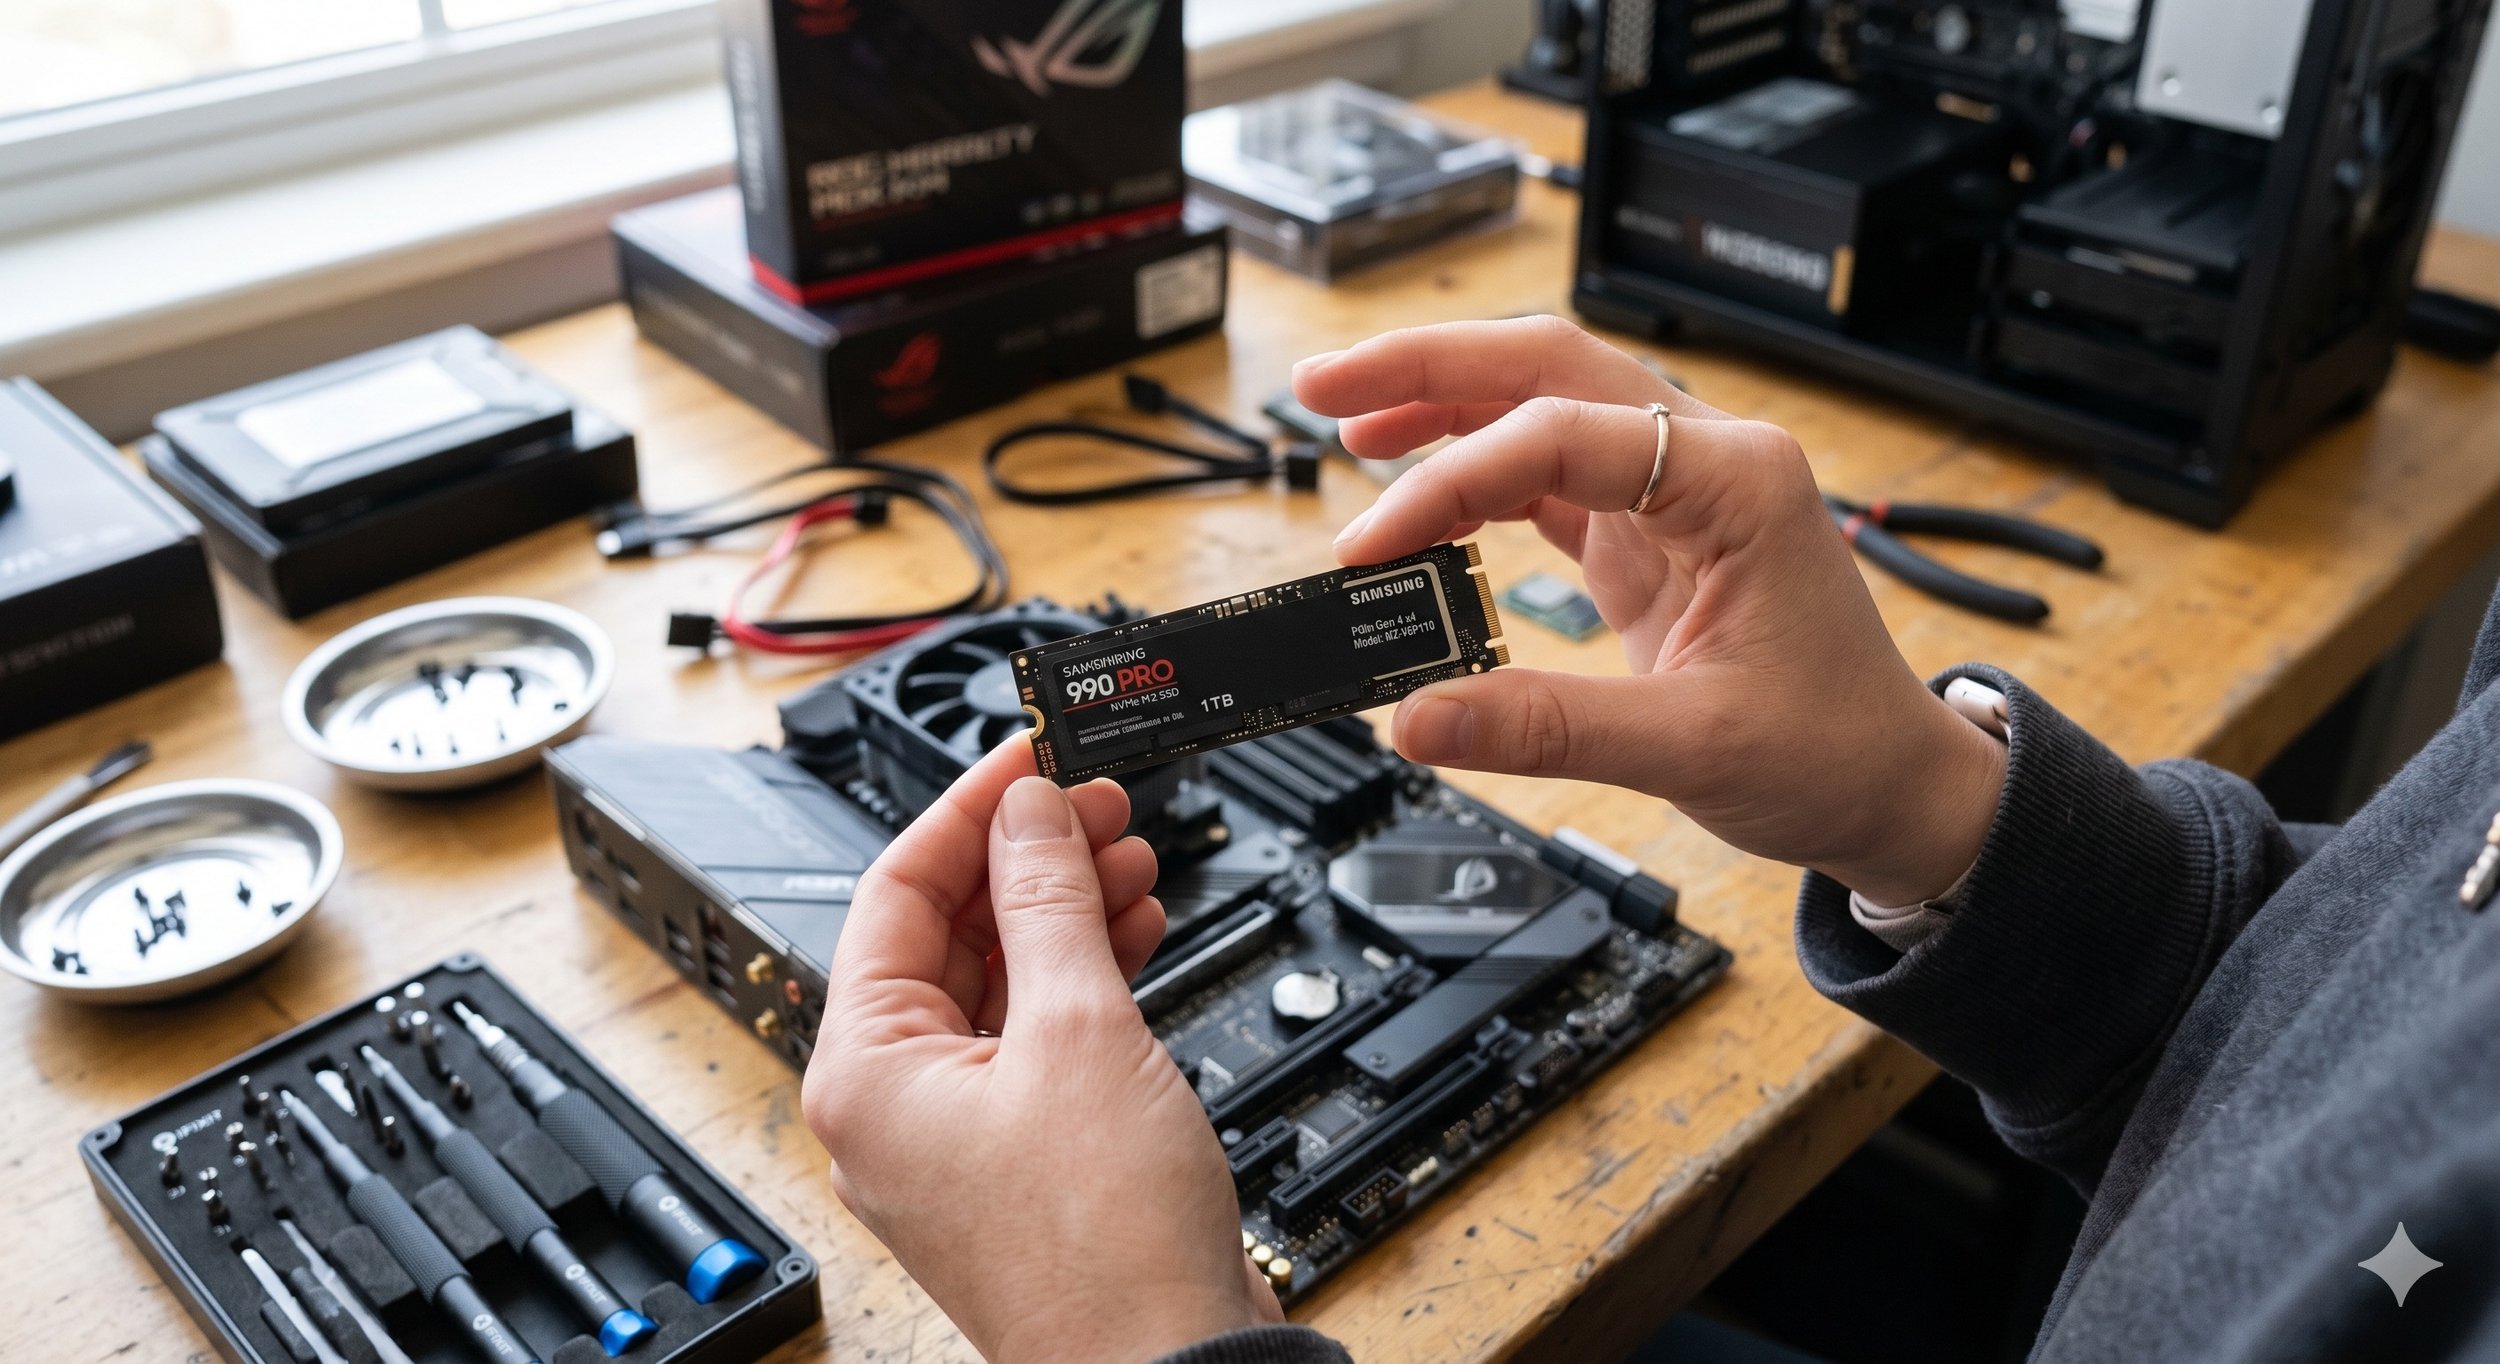
It's Time to Insert The NVMe Drive
Many motherboards have built-in M.2 heatsinks remove it if equipped. Unscrew it to reveal the slot, then carefully peel off the protective plastic film from the thermal pad underneath, align the notch. Firstly, look at the gap in the SSD's gold connectors. Line it up directly with the notch with the motherboard's M.2 slot. It’s worth noting, the drive only goes in one way.
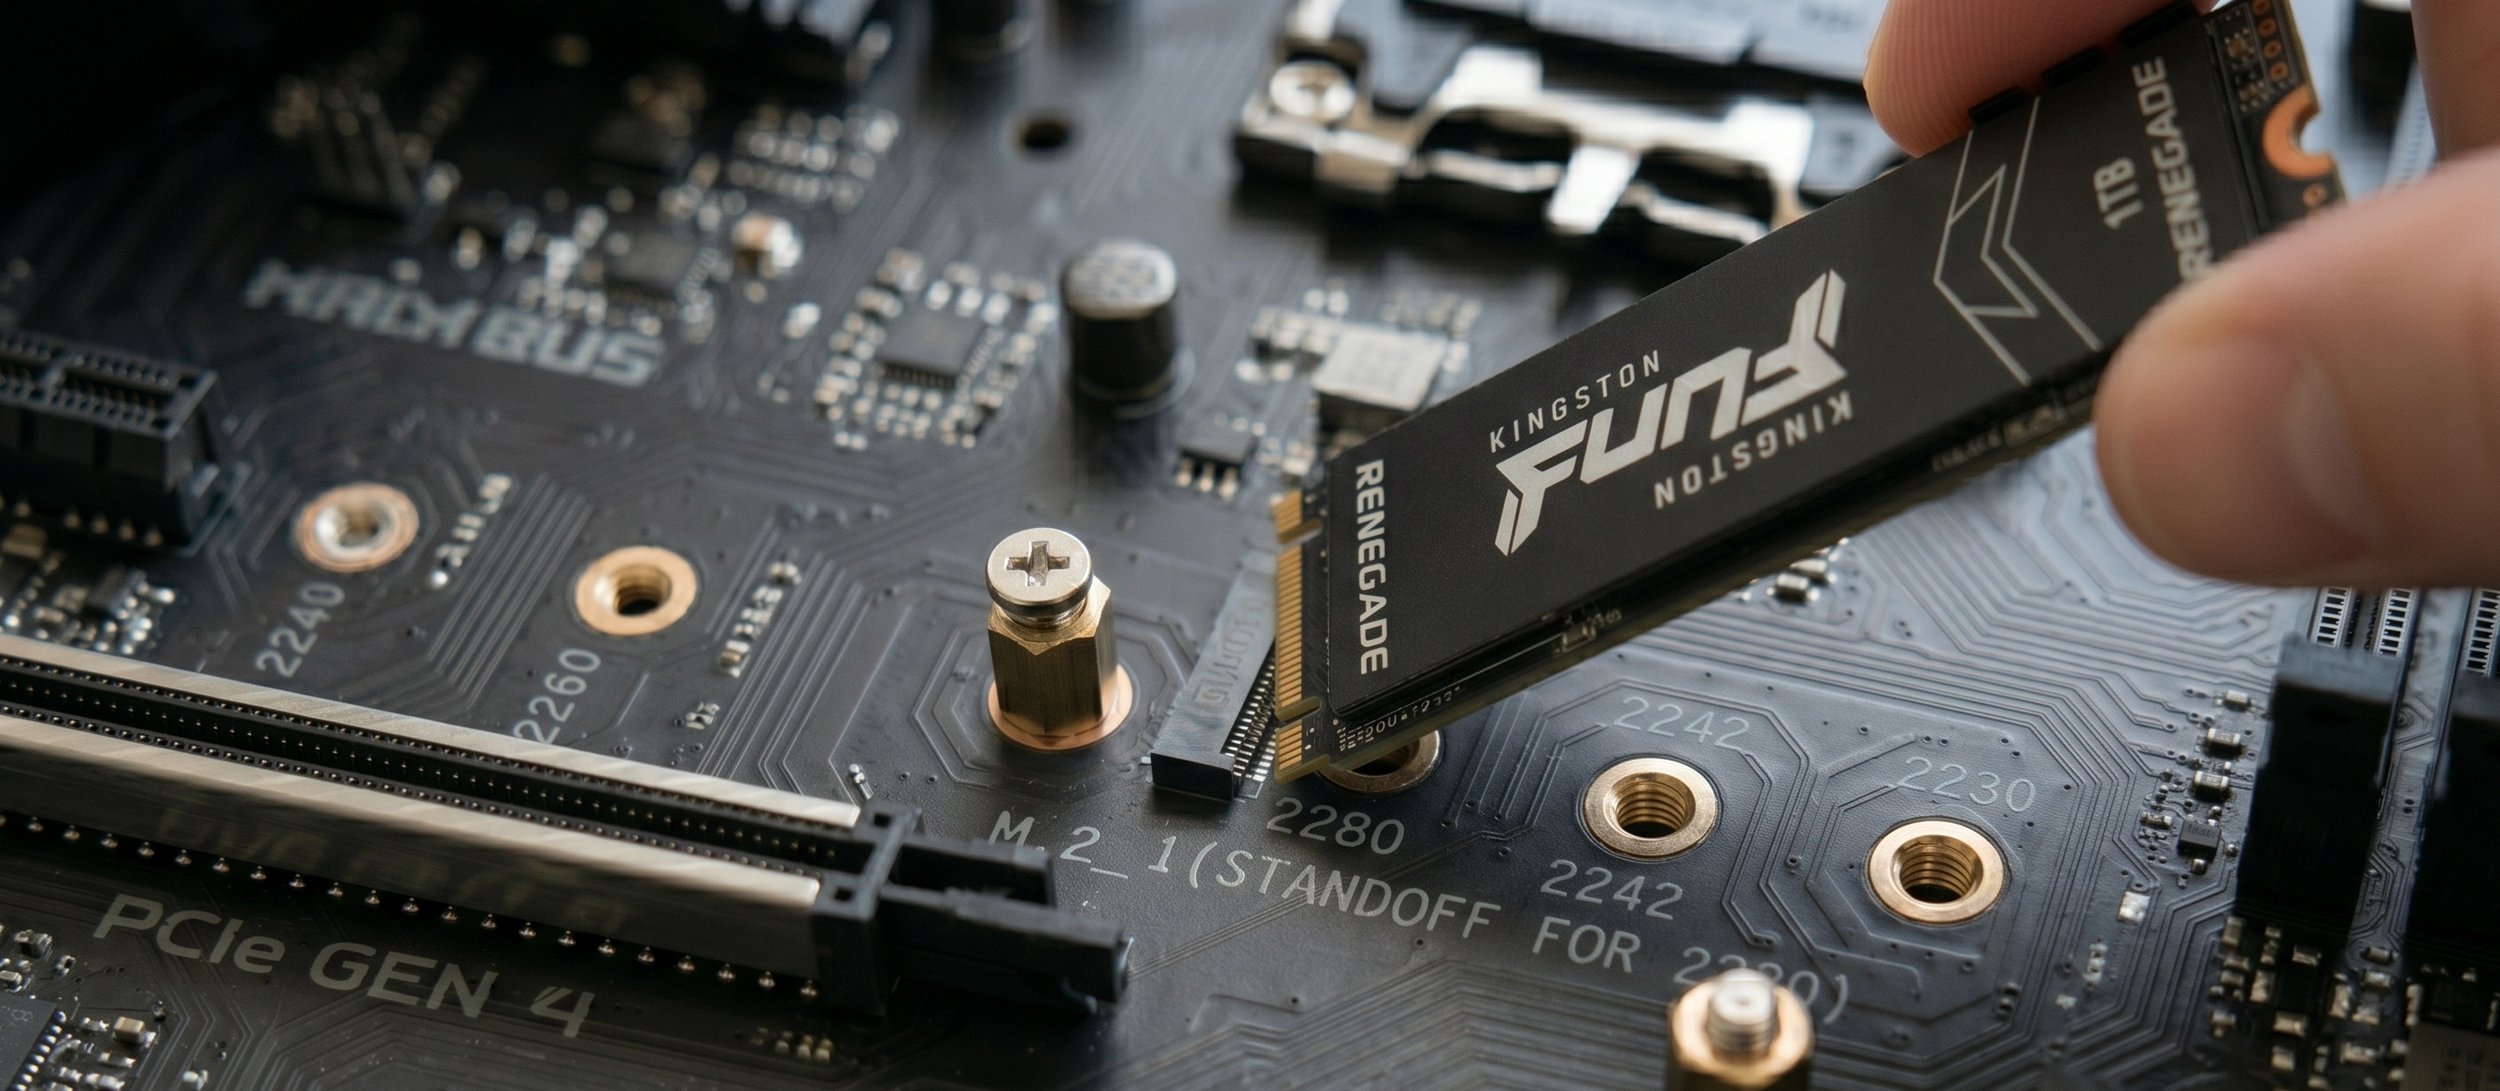
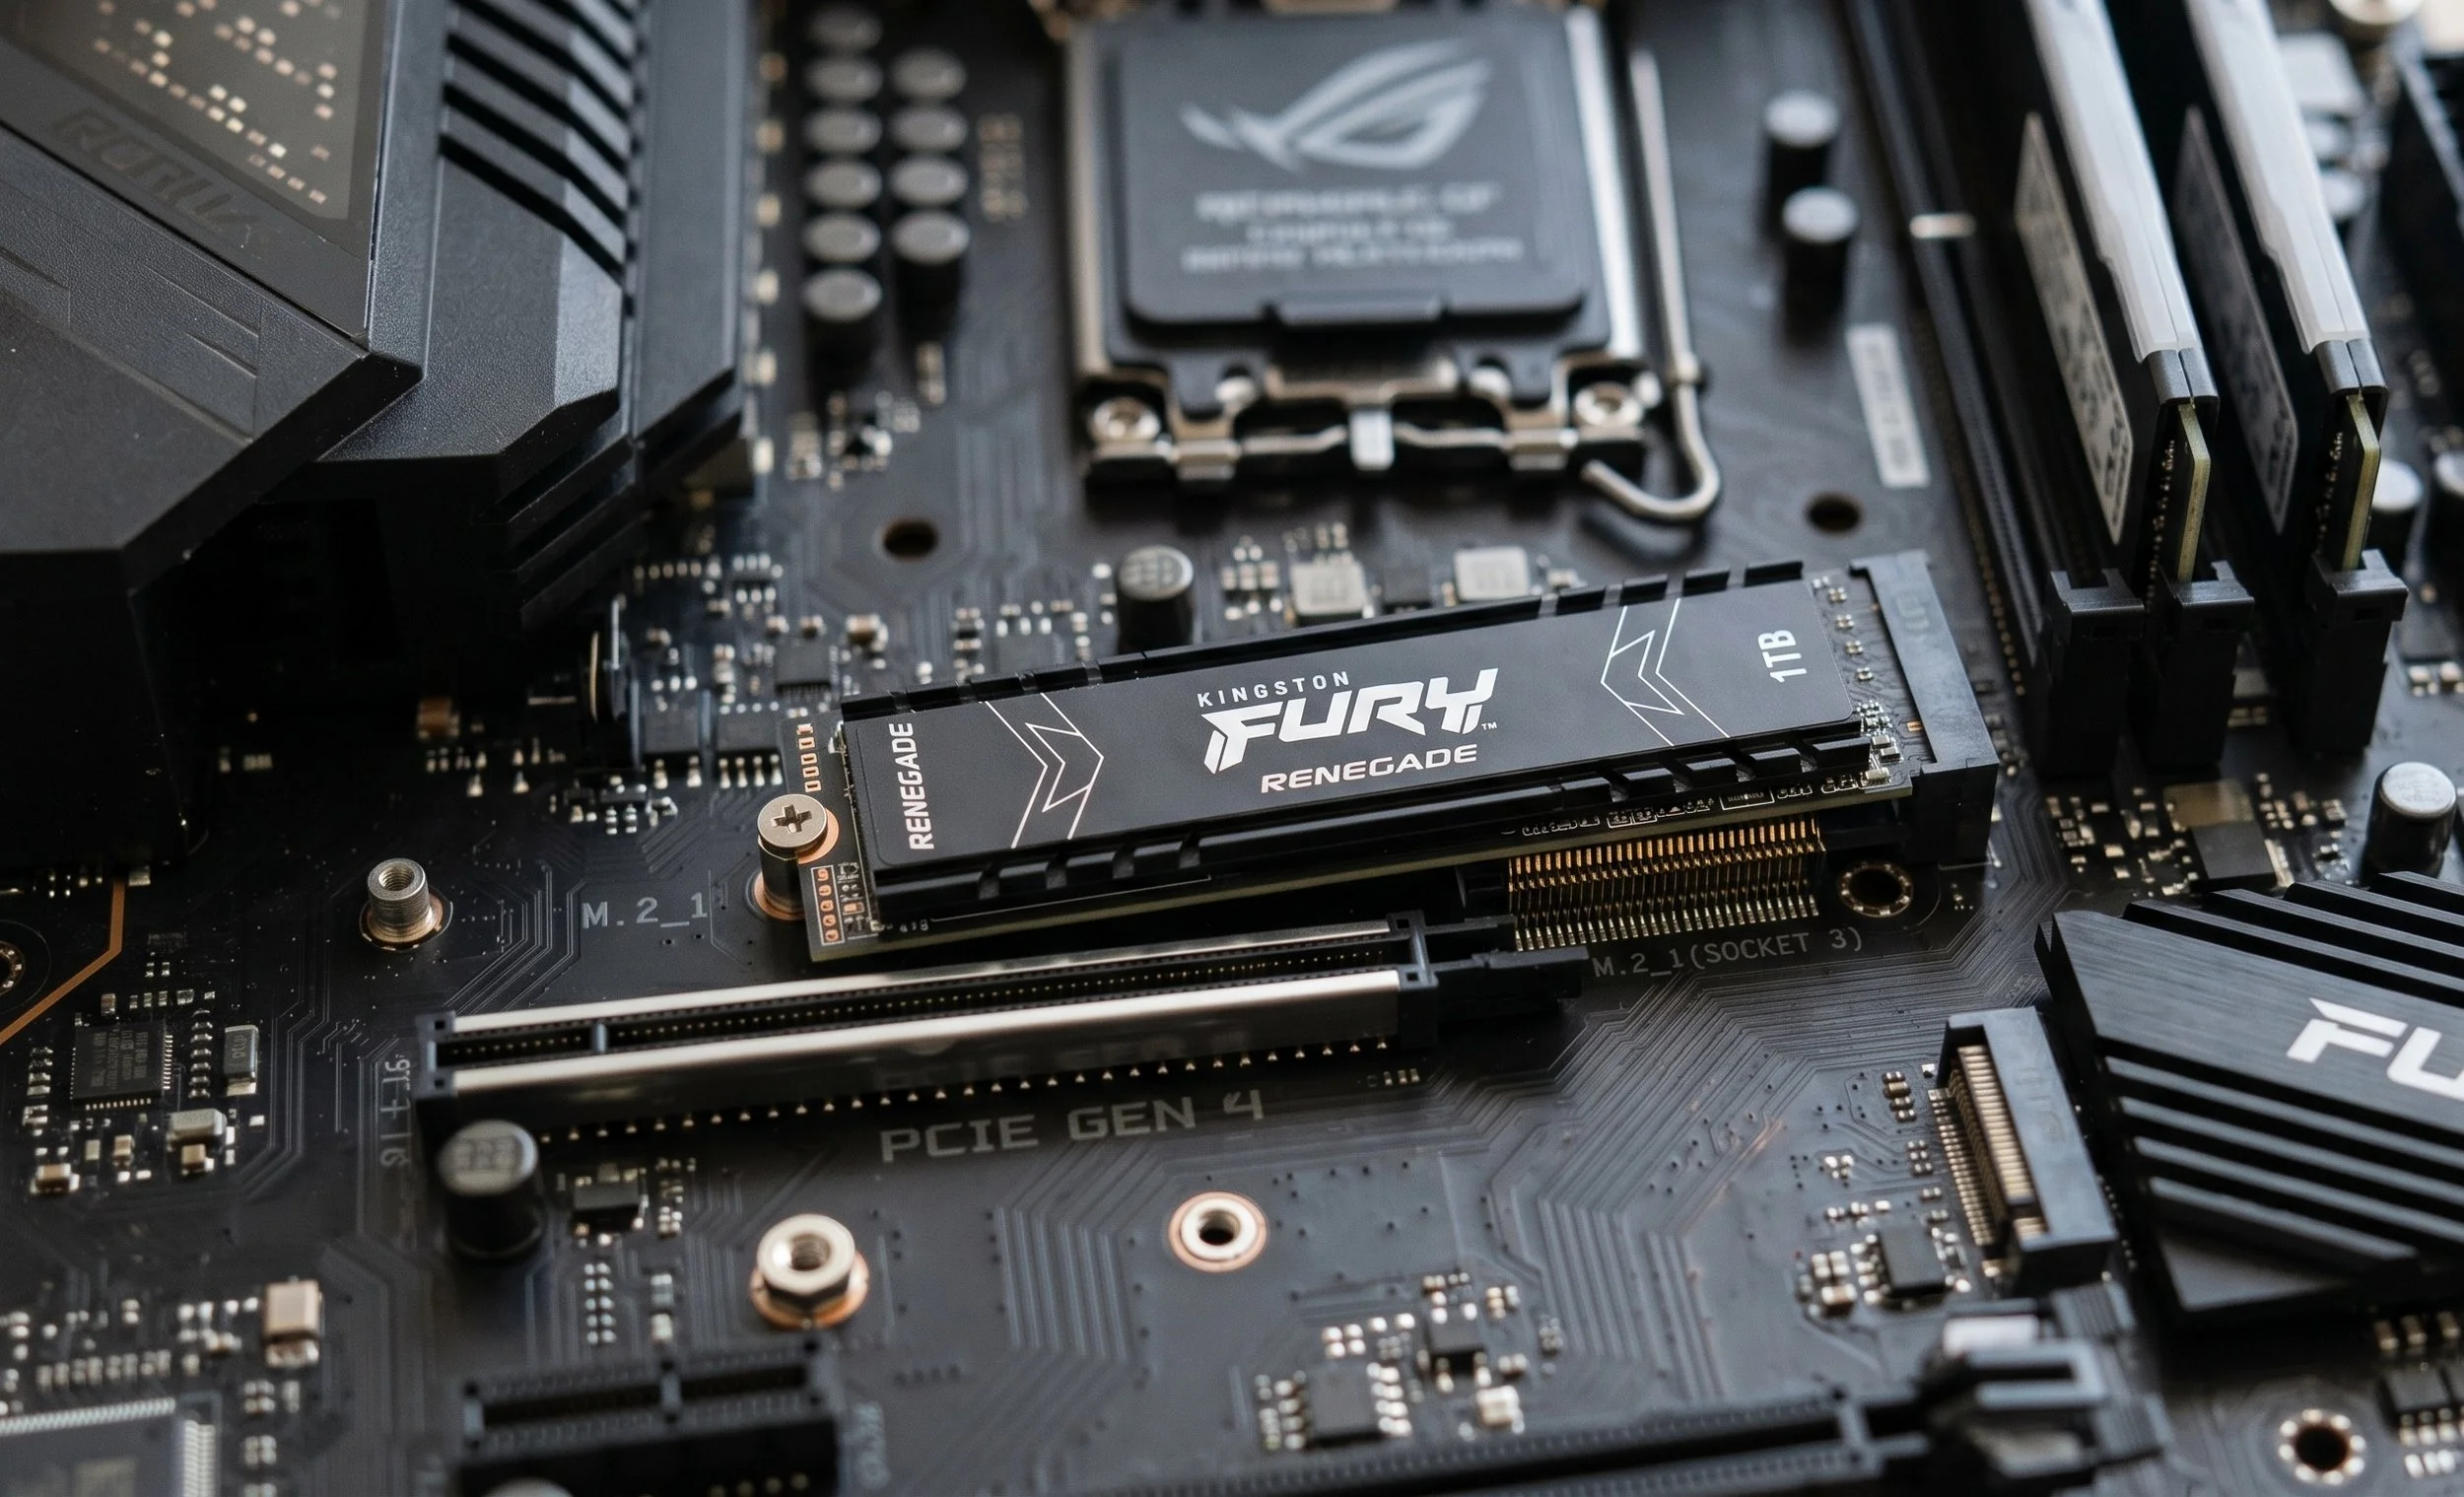
Once you have lined up the drive with the M.2 slot, insert it at a 30-degree angle. Carefully push the drive in firmly until the gold pins are fully seated and well hidden. When fully inserted, the drive will naturally spring up and hover at an angle. By the way, this is completely normal.
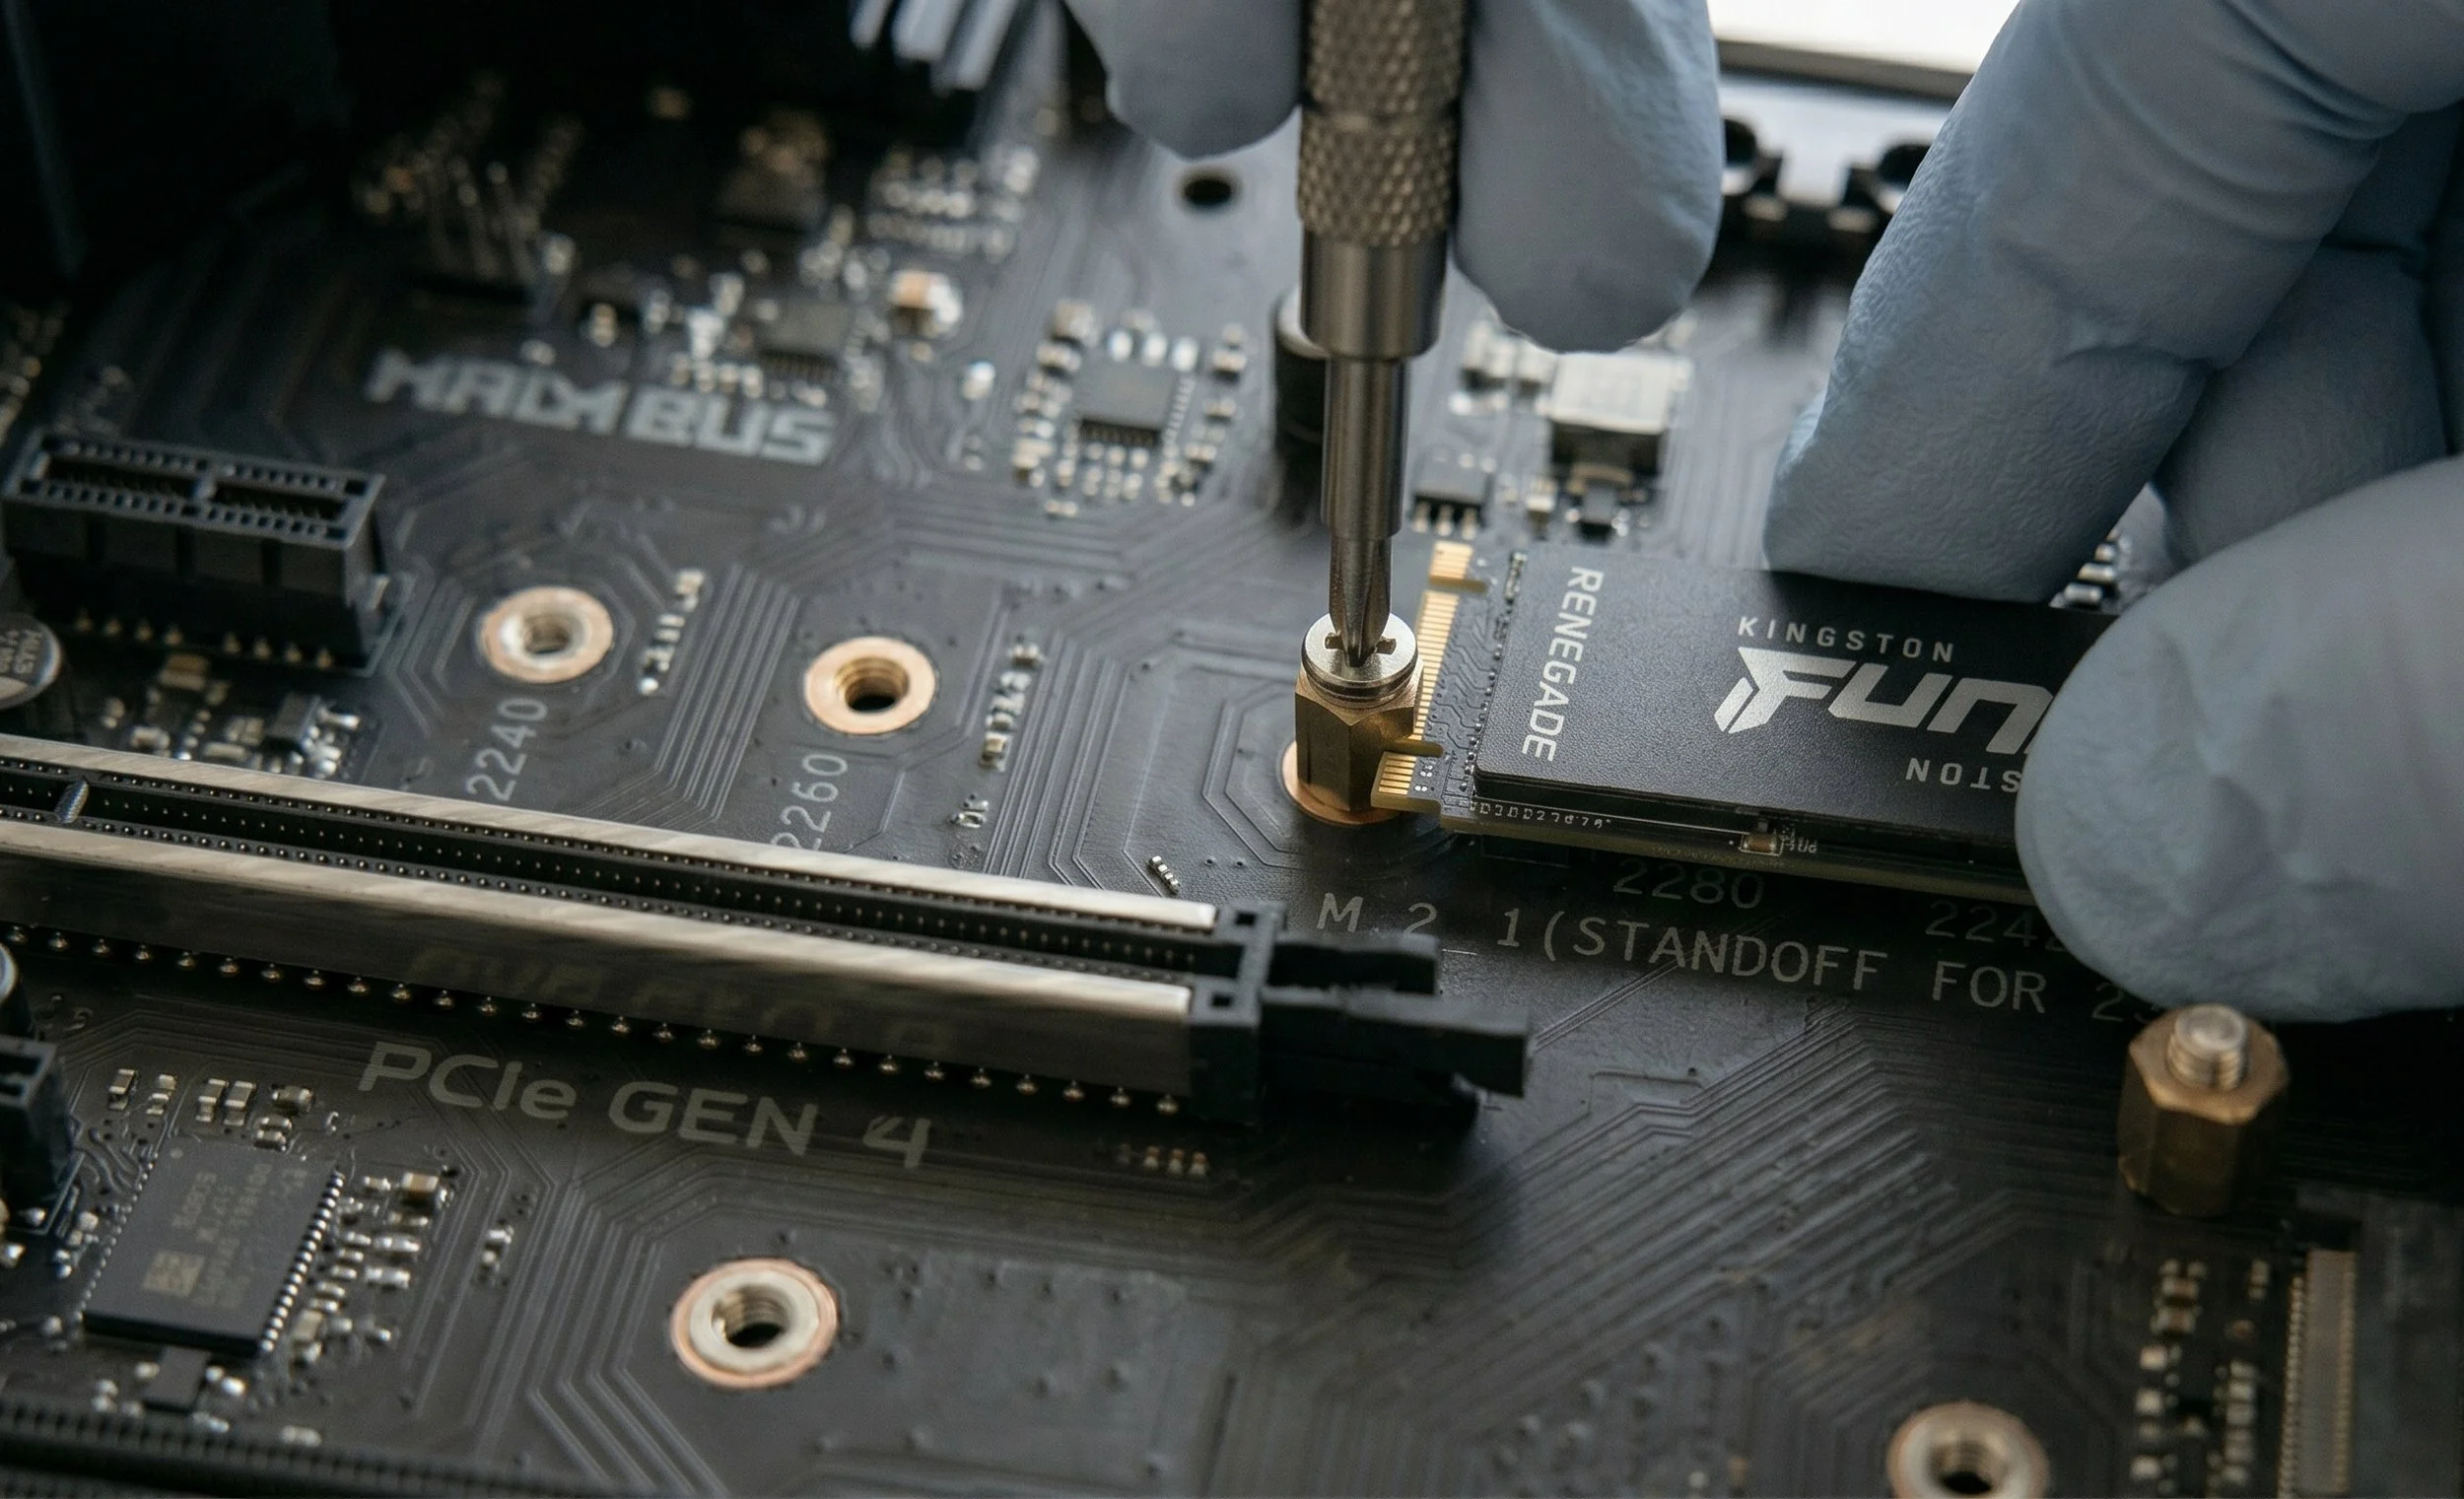
It's Time to Secure That Drive
Gently push the floating end of the SSD down so it rests flat on the top of the standoff. Use the tiny M.2 hexa screw that came with your motherboard (or drive) to secure it to the standoff. Do not, I repeat, do not over-tighten the screw. Turn it until it fits snugly; forcing it can strip the tiny threads or crack the drive's PCB.
Now it's time to reinstall the heatsink, place it back over, and screw it back on.
Initialize The Drive For Secondary Storage
Power on your system and boot into Windows; your brand-new drive will likely not appear in "This PC" right away. That is because the drive needs to be initialized. Right-click the Windows Start button and select Disk Management. A pop-up should automatically appear that says a new disk needs to be initialized. Select GPT and click OK.
Now find your drive at the bottom of the list (you should see a bar labeled "Unlocated Space"). Right-click on that allocated space, select New Simple Volume, and click Next through the wizard to assign a drive letter and format it (NTFS). Your drive is now ready for operation, whether you're using it for secondary storage or installing an operating system—you can begin uploading files and applications.

The Conclusion
So there you have it, you just installed your new storage drive ( NVMe SSD). The installation process is fairly easy, but success depends on attention to detail. Before you close your case and boot into your OS, put together a checklist to ensure you have a functional drive: 1. Make sure the drive is securely inserted into the M.2 slot. 2. If the motherboard includes a built-in M.2 heatsink, double-check that you removed the plastic film from the thermal pad, and 3. head straight into the BIOS to confirm the motherboard detects the new drive. Once confirmed, you’re ready to initialize the drive in your operating system’s disk management utility and allocate the space. Now you can enjoy your new NVMe SSD.